Jun 30, 2011

Just one ingredient. Yes!


Dessert with one ingredient!
Yes, it is. Its completely possible, and is yummiliciously yummy. And yes, so soft that you can scoop it up. And so healthy that you don’t need to add a single tablespoon of sugar, or feeling guilty about eating an entire tin of this one. And no, I am not kidding, you do not have to hate me for this introduction either! :)

During a fun evening where I and this friend were exchanging tips on food and generally yapping about food, she told me about the concept called Single Ingredient ice-cream, the basic steps on how to do it, and asked me to read up a bit more about it, which I did.
Its the simplest EVER recipe to the yummiest EVER ice-cream. No, seriously!

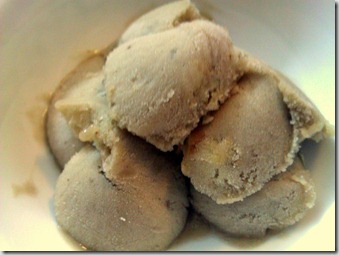
Peel one banana, freeze it till it gets rock hard, blend in a mixer to a paste, and re-freeze it. And lo, you have the yummiest ice-cream ever.

Photo_597837E5-2194-B04A-4A1C-EDC8F9FDFF0D

Recipe Courtesy : My friend S, and this link.

You can make your own variations to this recipe, by adding choco chips, blueberries, cocoa powder or anything else into the paste before re-freezing it. More ideas here!

Jun 27, 2011

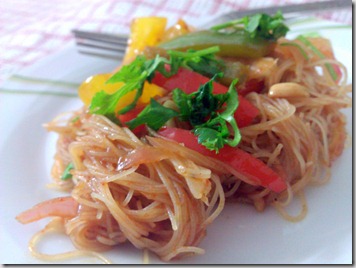
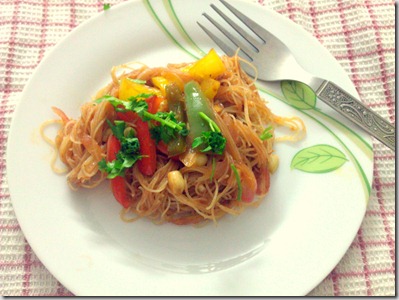
Pad Thai noodles. Well, almost. :)


So here’s the deal with me. Turns out, I don’t just like cooking for myself, I HATE it. But then, paapi pet ka sawal hain. And I must make something to fill this stomach, and especially after the evening walk, with the stomach rumbling in spite of all the fruits I had, I needed to eat something super fast, and it had to be interesting so that I don’t ditch it midway. So I really had to think long and hard this evening.
Quite sometime back, when I had freshly discovered cooking Thai food at home, I bought myself a pack of rice vermicelli Thai noodles. Along with many other groceries that I buy , this one was put in the pantry, and was hence promptly forgotten. Only last week when the maid was cleaning up the pantry, did we discover a whole load of items that I bought, all in good intentions to be cooked and eaten. But then, they followed the Life Cycle of Groceries in my kitchen!
Its like this – I see something interesting in the aisles in the mall, I buy it immediately, and resolve to make something delicious with it the same evening, or at the max, the next. So this item sits on the kitchen platform, waiting to be cooked. Weekdays are typically busy weeks, and considering the husband’s dislike for anything that is not Andhra food, this does not get cooked during a weekday. I then plan to cook it over a weekend, and like all other weekends, either we end up eating some place out, or I am too tired to make something and so end up eating rice-dal (always the husband’s suggestion!). So after a week of sitting on the kitchen platform, its location is changed to the pantry unit, which is where it will sit till it is rediscovered by chance.
Basically - in my kitchen, matter does not change its form or shape or even state. It just changes its location ;-)
Photo_2C5092D4-BDFA-EF4D-DE25-D455D85F2268
I have been thinking I should make something with those noodles all weekend, and this evening seemed to be the right time. I quickly searched for some noodle recipe. Yeah yeah, I know its simple and all,but given the non-noodle-y (literally also ;-)) person that I am, this being my first time ever, and I needed some guidance from those awesome people sitting in my computer.
Pad Thai seemed interesting, but the procedure to make it seemed a little complicated for my at-the-verge-of-fainting-due-to-exhaustion-brain. Moreover, the dutiful wife that I am (Ha ha ha!) I was waiting for the husband to get to home before I do some decent vegetable shopping. The veggie compartment in the fridge just revealed bell peppers. That’s all! And the meal had to be healthy and veggie too, right? Phew! I just picked up the recipe for the Pad Thai sauce, read the instructions on the packet of the noodles on how to cook them, and got started.
Ingredients1/2 Onion – Chopped vertically
1/4 of a bell pepper – Red, yellow and Green – Chopped vertically
Handful of peanuts, De-skinned
8-10 cloves of garlic – crushed. (I use a traditional mortar and pestle for this.)
1 tbsp sunflower oil
100 gms Thai rice vermicelli noodles (or any Thai noodles)
Salt – To taste
Chopped Coriander leaves – For garnish

For the Pad Thai sauce 1 tbsp tamarind paste
1 tsp red chilli powder
4 tbsps hot water
1/2 tbsp soya sauce
1 1/2 tbsp sugar
Photo_BF2379F7-E00E-5D0F-C763-96189BB58CF5

ProcedureCook the noodles per the instructions given on its packet. Mine said I should soak the noodles in normal water for 5 minutes and drain it.

Mix all the ingredients for sauce, and keep it aside.

In a wok, heat the oil. Add the onion, crushed garlic and let it cook till the onions get soft, and pinkish. Now add the bell peppers, and let them all fry on a medium flame for 5 mins.

Add half the amount of the sauce to the wok now, and let the vegetables simmer in this sauce. Cook till the sauce gets absorbed into the vegetables, for about 5 mins on a medium flame. Add required amount of salt.
Now add the noodles to the wok and toss the contents. Add the remaining sauce (you can reduce the quantity if you are not greatly into tamarind) to this, and cook on a medium flame, till the consistency of the noodles is dry, the noodles look cooked, and the sauce is absorbed.

Note:
  1. The quantities ingredients given here are to suit just one person, for dinner. You can easily increase the quantities
  2. The instructions are suited to make almost-Pad-Thai noodles because the recipe I read over the internet for Pad Thai did not have peanuts, and I cannot imagine anything Thai without peanuts.
  3. Bell Peppers are what I used. You can use any vegetables. Carrots, beans, sprouts, Chinese cabbage, cabbage. Anything.
  4. If you are not as much into garlic as I am (I always double up the number of garlic cloves in any recipe!), feel free to cut it down. But trust me, it wouldn’t be as tasty without garlic
  5. If you feel that your noodles could do with a little more tanginess, you can drizzle lemon juice on them before digging in. :)

Jun 14, 2011

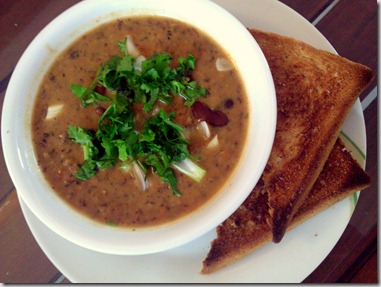
Red bean soup–Another meal-for-one!


I had a good day today, met a friend and her adorable daughters in the evening, and generally had a lot of time for myself, to think, to introspect and to wonder about life… But then one of the inevitable things in life is food, and like everyday of this month, I had to make something for myself, yet another meal-for-one. Seriously, thinking of a new meal every single day is tiresome even for a foodie like me, especially if the meal has to fit in what-I-think-is-healthy-bucket. Phew!

I wasn’t in a great mood to eat food, I had the awesome Banaganapalle mangoes at hand, as a life-saver if I were to get really hungry at night and so I decided to make something super light for dinner. Like a soup. I could’ve had Maggi, but since the food-revolution in the household which started a couple of years back, all packaged food is

Yday, I had tweeted asking for suggestions for a meal-for-one, and one of the suggestions I got from Kishi was this easy no-fuss-meal.

Now, while tidying up the grocery unit over the weekend (yeah, an annual activity in the household), among a zillion items that I already have 2-3 sachets/packets of, I also found a packet of kidney beans (rajma). In an attempt to get to them sometime this week, (God alone knows how , I am meeting friends every single day of the week, and yet I plan for dinner at home every single day!) I soaked them to soften them. So I read the recipe from the link above, made a quick mental math on what ingredients I actually have handy, and gave it my own spin. Here it is…

Photo_239C8B48-94A0-7AAE-7026-F3FBCA627D17

Ingredients
Red Beans – 100 gms , soaked overnight and pressure-cooked till soft
Spring Onions – 4-5, chopped
Garlic – 5-6 cloves, chopped or crushed in a mortar-pestle
Tomato – 1 , cut into medium sized chunks

Olive oil – 1 tbsp
Herbs like Oregano, Thyme, Rosemary, Basil – 1 tsp each
Paprika Powder – 2 tsp (depending on how spicy you want it to be)
Sea salt – a pinch, or per taste
Mexican Seasoning – Optional, I use the ones from Keya

Instructions
In a deep-bottom pan, heat the olive oil, and slightly roast the garlic and onion pieces in it. Put in half the amount of boiled red beans to this, and roast it slightly. Now add the tomato pieces to this mixture, and let it cook for 5 minutes on a medium flame.
Now add the herbs to this mixture, and mix well, so that the veggies and beans take in the flavour of the herbs. Add the salt, and paprika powder to this, and close the pan with the lid, and cook for another 5 minutes on medium flame.
Turn off the stove and let this mixture cool for a bit.

Now, mix these well enough in a mixer with the remaining beans and just a little water. The resulting paste should be thick enough.

Transfer the contents from the mixer into the pan and add some water to this. Now boil the contents. Add the paprika powder and salt again to suit your taste, and add a pinch of the seasoning, if required.

Bring this thick mixture to a boil, garnish with onions, garlic and coriander leaves.

Serve hot as it is or with toasted bread, or garlic bread.

Optional – You can add more water to this if you like, but since the whole purpose of eating the bean soup is to get as many proteins as possible, I made it very thick.

Jun 13, 2011

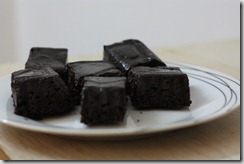
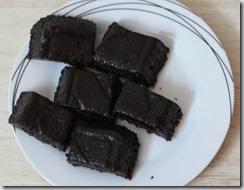
Cherry Brandy Brownies


While browsing for some good eggless brownie recipes, I bumped into this awesome brownie maker site, which has practically the recipe for every brownie in the world, using every possible ingredient. I loved it so much that I must’ve used it to bake atleast 5 different kinds of brownies, and all of them have been loved, asked for repeatedly and savoured by everyone who’s had one!

This one is just a template ,and you can substitute cherries for any fruit, and brandy for any drink you want. I baked this when we had friends over to watch one of the world cup matches, and they were finished before the match! Yeah, even the humongous amount of butter in this did not deter folks from digging in… :)

IMG_8028

So here it is, a slightly modified eggless version of the original recipe.

Ingredients

150 gms butter
1-1/4 cups cocoa powder
2 cups sugar
1/2 tsp salt
2 tbsps brandy
10 tbsps thick cream (or 5 eggs if you don’t want it eggless)
1-2/3 cups AP flour
3/4 cup dried cherries
1/2 cup raspberry jam (I used cherry jam)
A pinch of cinnamon powder (optional)

IMG_8029


Instructions

Pre-heat the oven to 185C and butter the aluminium foil pans.
Slightly melt the butter, so that it melts into a liquid, and whisk the cocoa powder in it once it cools a bit. Mix in the sugar and salt to this mixture.
After this mixture cools a bit, whisk in the brandy, cinnamon and the cream.
To this mixture, add the flour, and dried cherries and mix till it just blends.
Now mix the raspberry (or cherry) jam into this mixture, and mix just till it blends.
Pour this batter into the butter foil pan, and bake for ~35 mins. You’ll know that the brownie is done when the inserted toothpick comes out with some crumbs of brownie.
Once they cool, cut and serve the brownies either with ice-cream or just as-is.

And then tell me how they turned out! :)

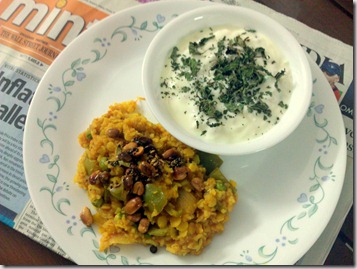
Bisibele Bath


Ah, the days of meal-for-one are back! But unlike eating just some vegetables under the pretext of salad, or a fruit calling it diet, I’ve decided to eat something substantial yet light for dinner. But then, cooking for one person is always a big pain. First its the quantity. No matter how less you make it, you will notice that its too much to eat for one person. Then its the taste. Only you know how it tastes. This is certainly a good point when an experiment goes bad, but in my case where 9/10 experiments are edible and tasty, I will have no one to compliment the food. And if the food is not complimented, I don’t feel the interest to cook again! (There, you’ve been notified on what to do, if you were to eat something I cook! :))
Tonight, I was in a mood to eat something rice-based, but not elaborate. Something like a one-pot-dish but not as boring as Khichdi. A friend suggested I make Bisibele bath, and that’s when I realized I hadn’t made it in a zillion years. And being a Kannadiga/Mangalorean, its something I should be ashamed of. See, you should always eat what you’ve grown up eating, and Dal and curry are not what I ate growing up… It was coconut-vegetable-filled delicious Mangalorean stuff that I ate till I was 22, and random, unmentionable, yucky, unhealthy hostel/hotel food till I was 25, and since then its just been pappu (dal) , koora (curry) every single day. EVERY single day. Phew! So every opportunity to cook non-dal-curry food is savoured and enjoyed to the hilt , and that opportunity comes mostly when the husband is not around! :-)
Back to BBB, I always have this Mom-made-awesome-BBB powder handy in the fridge, and all I had to do was to find the veggies in there. Turns out I’ve been living like a hermit feeding only on air, because the fridge had none of them. Yes, I am hopeless that way! Some rummaging in it revealed one capsicum and some spring onions, and thankfully some green peas. And I set about to make myself some tasty dinner…
Ingredients1/2 cup Toor dal (preferably soaked for atleast 30 mins)
1/4 cup Rice
1 cup Veggies
2 tbsp BSB powder (You can use MTR BBB powder)
1 tbsp Tamarind paste (Dabur Hommade to the rescue, Mom for me!)
1 tsp oil, to slightly fry the veggies
1/2 tsp turmeric powder
Salt – To taste

Garnish (Tadka)1 tbsp Ghee (clarified butter)
Some nuts – Cashew or peanuts
1 tsp Mustard seeds
1 tsp Urad Dal
1 tsp Chana dal
1 tsp Jeera (Cumin seeds)
Some Hing (asafoetida)
Photo_BD2A5766-360D-040D-991E-B4EB3C66C233
InstructionsIn a pan, bring 2 cups of water to a boil and add the dal and rice to this. Close the pan and keep an eye on it. Wait till they are both half-cooked.
Meanwhile, cut the veggies, and fry them slightly in the oil. Add one tbsp BBB powder to this mixture, and fry a bit more.
Once the rice and dal mixture is half-cooked, add the half-fried veggie mixture to this, rest of the BBB powder , tamarind paste, turmeric and salt.
Add 1 cup water and cook this mixture till the water is absorbed or the veggies and rice-dal are cooked.

In a smaller pan, heat the ghee, add the nuts, urad and chana dals first. Wait till they are almost brown and add the mustard and cumin seeds. Switch off the stove, and add the hing to this.

Add this Tadka mixture to the cooked Bisibele Bath.
Bisibele Bath literally means Hot-Dal-Rice and hence this should be served hot.

You could eat it with Boondi or Potato chips, or also with Raita

Since I prefer raita to the other two options, I made myself a cup of onion raita, garnished it with dried mint leaves and had a very tasty healthy dinner!

Jun 11, 2011

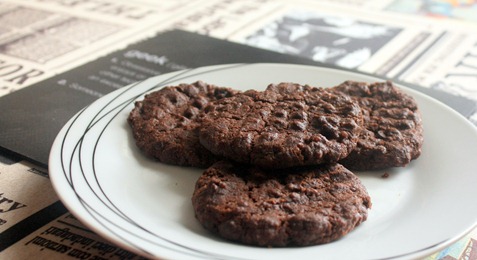
Chocolate Choco chip cookie


Oh well, I’ve heard the whole buzz about chocolate chip cookies and a warm/cold cup of milk to go with it, and I’ve never really got it. Okay, so its a cookie and that’s a glass of milk. What’s the big deal, right? Well, no. As I found out through experience just a while ago, chocolate chip cookies DO really go well with a cold cup of milk, and the best thing to have on a weekend morning! :)

So there was this whole what’s-the-deal-with-choco-chip-cookies and also this tea party that a friend is hosting this evening. Two good reasons to dunk in a whole lot of butter, and I thought why-not!

I took a basic recipe of chocolate chip cookie, and modified it slightly to make it eggless, and more chocolatey.

IMG_8079

Ingredients
125 gms dark baking chocolate bar
2 cups AP flour
2/3 cup Cadbury’s cocoa powder
1 1/4 tsp baking soda
1/4 tsp salt
200 gms butter
1/2 cup brown sugar
1/2 cup while sugar
4 tbsp thick cream
1 tsp vanilla essence
1 cup chocolate chips

Instructions
Melt the dark chocolate in a microwave for 50 secs and temper it well enough, set it aside to cool.
Pre-heat the oven to 185C.
Sieve the flour with cocoa powder, salt and baking soda.
In another bowl, cream the butter with the sugars. Add cream and melted chocolate to this mixture, and mix well. Now add the vanilla essence and mix well.
To this butter mixture, add the flours and mix well enough. Fold in the chocolate chips.
Pour dollops of this batter on a parchment paper and a cookie sheet , and bake for 14mins.
Let the cookies cool on a wire rack.

And yes, whatever is left off the batter in the  bowl, please lick it off. :-D

These measurements yielded ~30 mid-sized cookies.

Jun 9, 2011

Oatmeal Cranberry cookies


What do you get when you put a woman in a house full of dried fruit and similar baking stuff (Thank you, US trip! :)). Add a hint of not-bad-but-good-loneliness , some boredom , a happy mood and a huge appetite for eating good food to the situation. Yes, you get Oatmeal cranberry cookies, with dark chocolate chips in it!

I got a lot of dried fruit stuff from US this month, a friend got me SilPat, and I was itching to make something. Bake some cookies may be, and make them healthy so I can eat them as a mid-meal-snack without feeling guilty. 

Today looked perfect. As I returned home from work, I saw that the weather was good, and after the almost-hurricane-like-wind, it was cool gentle breeze flowing into the house, I was reading a book sitting on the couch and thought, why not today!

A quick search for a Oatmeal cranberry cookie recipe led me to one of my favourite food-blogs – Madhuram (the name means sweet in Telugu). I checked that I had all the ingredients at hand. Since the intention was to get an eggless one and not a vegan recipe (I still am miles away from turning into one!) , I made some minor changes to the original recipe.

IMG_8049

Ingredients

75 gms butter (I used 3/4 off the 100gm Amul butter bar)
1/3 cup Granulated Sugar
3/4 cup Brown Sugar
1 teaspoon Vanilla Extract
1/2 cup milk
1 cup whole wheat Flour
1/2 teaspoon Baking Soda
1/2 teaspoon cinnamon powder
3 cups Quick Cooking Oats
1 cup Dried Cranberries
1 cup dark chocolate chips (Optional, but then who doesn't like chocolate!)

Yeah yeah, I know that’s a lot of butter for someone who is on a perennial lose-weight-diet, but then I didn’t say I wanted a fat-free recipe. I wanted a healthy one. :-P

Instructions

Pre-heat the oven at 185C and meanwhile mix up the ingredients.

Cream the butter, and add the sugars to it. Once its well blended, add the vanilla extract and milk and mix well.
Sieve the flour well with baking soda and cinnamon powder, and mix this into the butter mixture.
Now add the oats, cranberries and chocolate chips to this and mix.

Make 1-rupee-sized balls of this cookie dough and press them slightly on the greased cookie sheet with a fork. I generally use parchment paper on my cookie sheet, and I had the Silpat also today.

Bake for at least 12mins at 185 C , if you want them slightly crunchy let it stay for 14mins.

Take them off the oven, and wait till they cool. And if you are like me who cannot wait, please let your teeth dig into the cookies! :-)

Photo_B699D2E8-ACD0-71F1-6685-689086F95767

Now that I think of it, I have started to feel guilty about all that butter. But what the heck. Remember, I told I am a happy soul these days, and I deserve some butter! :-D

Jun 6, 2011

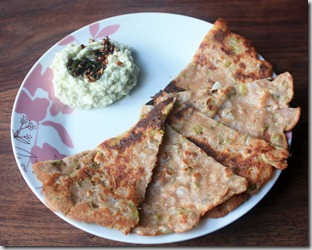
Bell Pepper Wheat Rotti


Akki rotti(rotti here doesn’t mean roti,its more like a mix between Dosa and roti) is a very popular Mangalorean dish, mostly eaten along with chai (tea) for snacks. This is generally made with rice flour, and is applied on a non-stick casserole and toasted till brown and chewy. It is then eaten with either a pickle or coconut chutney.
This recipe is a slight variation of the Akki Rotti mentioned above, and incorporates the healthier aspects of my Mom and cousin’s Ragi(rye) rotti. Loads of vegetables, clarified butter for the good fat and wheat and rye flour for the fibre content, and voila, you have a very healthy snack!
Ingredients:
Whole Wheat flour - 1 cup
Rye flour - 1/2 cup (optional)
Desiccated coconut powder - 1/2 cup
Salt - a pinch
Indian yogurt - Mixed into a pouring consistency, just enough to mix the ingredients into a batter - approximately 1 cup
Green chillies, finely chopped - 2
Onion, medium, finely chopped - 1
Green bell pepper, finely chopped - 1
Cilantro, finely chopped - a handful
IMG_8034
Method:
1. Mix all the ingredients into a batter, preferably pancake batter consistency
2. Heat the non-stick pan and slightly apply the butter/ghee on it
3. Pour one ladle-ful of batter on the pan, and spread using a butter knife or spoon. Please note that you will not be able to make it very thin or with a ladle. This will be slightly thick
4. Cover the non-stick pan with a lid, and let it simmer for 5 mins
5. Check if the side on the pan is browned, and reverse it, so that the other side is slightly toasted too
6. Cut into pieces and serve with coconut chutney
Notes:
1. You can increase the quantity of rye flour to increase the fibre content of this recipe
2. Mix and match yellow and red bell peppers too into this
3. You can also have this rotti with hummus, more protein that way
4. Instead of the coconut + yogurt mixture, you can also use coconut milk. Gives the flavour and still keeps the rotti soft.