Jan 31, 2012

Mocha Choco-chip cookies

Tonight was crave-for-chocolate evening, what with me craving for chocolate and hence eating the baking chocolate chips since evening. I decided to go ahead and bake myself some cookies, something I haven't done in a long long time, because of the enormous amount of butter involved in it.
IMG_9090
I modified this recipe by Chef in You to suit my mood and taste, and baked Mocha-Choco chip cookies, with a slight coffee flavour and a lot of chocolate oozing in it. I kept the flour, soda and liquid ratio same as the one in this recipe, but I altered the ingredients to make this eggless, and to use date syrup, something which I’ve been wanting to try instead of sugar for a while now.

Jan 29, 2012

Simplest ever Banana Muffins

Banana muffins are my favourite. May be it is because they are extremely simple to make, and there are a variety of recipes out there to make them, suiting the ingredients you have at hand. Or may be because no matter what  you do, you cannot screw up banana muffins.
IMG_9062


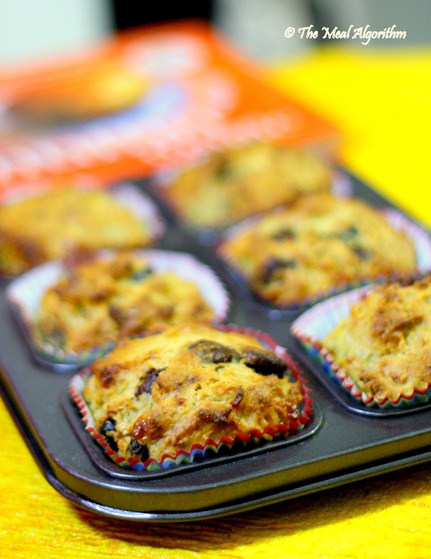
This one is an eggless recipe, yielding just 6 big muffins, just enough to serve as a snack for those mid-meal hunger attacks, or as breakfast for just a day, inspired by the Muffin Magic book I bought this weekend from the Crossword sale.
This truly is the simplest ever banana muffins I tried, and the fluffiest ever. Addition of the berries is totally optional, but they gave a nice tarty taste to the muffins, and blended well with the chocolate chips. The minute I pulled them out of the oven, I could actually see the chips melting, and the berries soft enough… it was really yummy.

Jan 28, 2012

My first love…


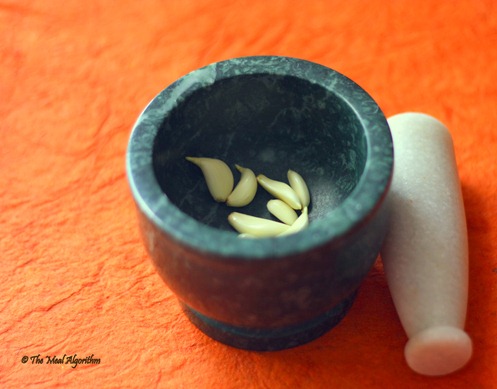
In the kitchen, is this. My mortar and pestle.
IMG_9027
After the initial excitement of having acquired this awesome pitcher is gone, mortar and pestle is back as my favourite item in the kitchen.
I crush garlic in this, and I staunchly believe that the only way to get the flavour out of the garlic and relish it is by freshly crushing it in a mortar and adding it directly to the dish.
I also use this to make ginger-garlic paste, crush peppers , cloves and cardamom. Basically, it is THAT one item that is most frequently used in my kitchen.
What’s yours?

Jan 27, 2012

Rotte Tiruvata

The title literally means – Roti, tadka lagake, or Tempered Indian bread in Telugu.

One of the traditional things-to-eat of the Rayalaseema region for Makar Sankranti is Sajja Roti. It being the harvest season, and Sajjalu (Bajra grains) being a staple for the peasants of the Rayalaseema region, this dish is immensely popular. It is something peasants eat daily, full of fibre , stay well for a long time because of their lack of moisture and the roti gets a distinct flavour because of the black sesame seeds that are stuck to it.

This time Mom sent me a bag full of these , for my snack times. I divided them into three equal pieces, one for the office desk for those really I-am-gonna-die-next-minute-hunger-attack moments, and two of them are at home, as evening-after-office-snack. I store them in small pieces, which serve as great snack bites.

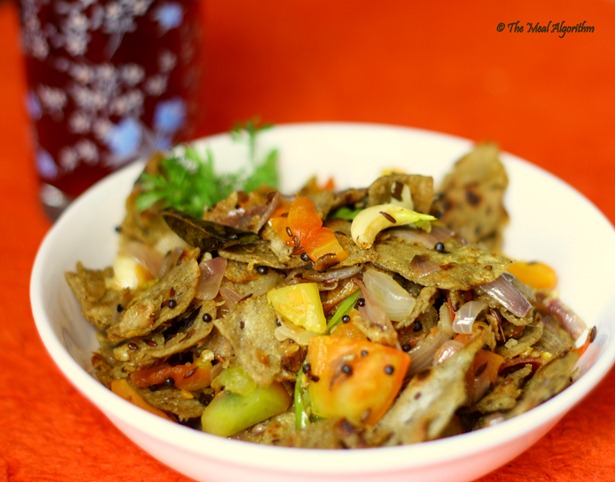
Today, I wanted to eat them with a slight change from the regular – pull the chips out of the box and munch – method of eating. I wanted to make something of a meal from them.

I refer to Mahanandi for any Rayalaseema related food recipes, and that’s where I got the inspiration for today’s lunch. I figured I could cook this roti like the other dried up rotis, and I used another Rayalaseema method to make the masala, which is what I used for this dish.

IMG_9042

Ingredients

Sajja Roti pieces – 1 cup
Onion – 1 medium sized, diced
Tomato – 1 medium sized, chopped
Garlic – 6-8 cloves, crushed
Green chillies – 2 , medium sized, cut in halves
Mustard seeds – 1 tsp
Cumin seeds – 1 tsp
Cooking oil – 1 tsp. (I used Mustard oil for the flavour)

Instructions

In a pan, heat the oil, and add the mustard and cumin seeds.

Once the mustard seeds split in the oil, sauté the onions, green chilli and garlic in this oil on a medium flame for about 5 mins.
Add the tomatoes to this and sauté them all together for another 5 mins.

Mix in the roti pieces at the end well enough so that the vegetables coat them all

Garnish with chopped cilantro and devour hot.

All the quantities given here are indicative, you can change them as you want per your taste.
Also, you can use left over chapati/phulka , Khakra or any Indian breads for this recipe.

Jan 25, 2012

Roasted Tomato puree

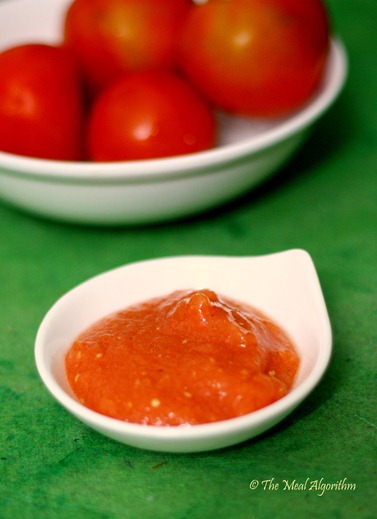
Once I discovered this method of making tomato puree (from N’s blog, in this awesome soup recipe) and its brilliant woody taste, I have not resorted to any other puree recipe. I use this puree in soups, for my pasta sauce, for my lasagne. In short, for everything and anything that needs tomatoes or tomato puree.

This puree keeps well in the fridge for up to a week, and longer in the freezer. I buy a kg of tomatoes at once, roast them on the stove, and store the puree in the fridge for the week’s usage , especially if I know what we would be eating that week, or if I am expecting any guests.

The beauty of this puree is that you don’t need to sieve it to remove the solids of tomato, or boil it after blending to thicken it. Because of the roasting method, the tomato is cooked/roasted at the same time, and hence does not need to be boiled. All the water content in it goes out of the tomato from the blisters it forms while being roasted.

Try this, and I promise you will never go back to regular puree.

IMG_8980

Ingredients (6 medium tomatoes make 2 Cups of puree)

Tomatoes –6 medium tomatoes, washed

Instructions

Pierce a fork into the tomatoes and hold them on the open flame of the stove. Tilt and twist the fork to ensure that all sides of the tomato is getting roasted. After a while, you will hear pop sounds, and the skin of the tomato like it is having blisters. This means, the tomato is cooked.

Repeat this for all the tomatoes. Let them cool, and peel off the skin of these tomatoes.
Blend them in a mixer-grinder to make a tomato puree.

Jan 24, 2012

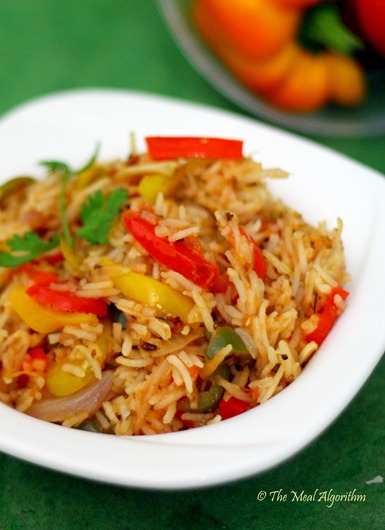
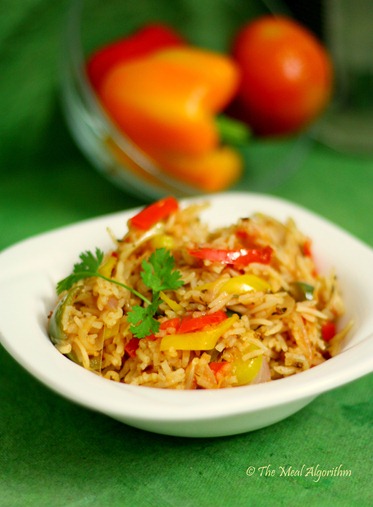
Spanish rice, with a slight twist

This was dinner tonight. Yes. :-D

IMG_8996

I start thinking about dinner generally by 5 PM, make that 4 PM if I am really hungry. So in the mental trip that I took around the fridge today, I saw a big bowl of roasted tomato puree (recipe here) and some bell peppers. I suddenly wanted to cook rice in tomato puree, and it sounded kinda bizarre in my head. A quick internet search told me that it is an actual method of cooking rice, called as Spanish rice. And that’s how this dish was born.

I found couple of recipes on the internet, and no two of them were similar. Hence, I decided to make my own modifications to the recipe, add the herbs I liked, and cook it in the flavours I wanted it to be in. Thyme and Red Chilli flakes got in as a part of this decision.

IMG_8979

The rice was cooked in roasted tomato puree, as opposed to the regular tomato puree or salsa method I found in my internet search, and I added 1:1 quantity of puree and water to cook the rice. I, however , did follow the method of browning the onions and garlic, but added the peppers after that to be sautéed along with them before adding rice.

The result was a very fragrant , fluffy and a colourful rice, which was a hit with the rice-lover husband guy.

Recipe inspired from – Simply Recipes

Ingredients

Roasted Tomato Puree – 1 cup
Yellow , Red and Green bell peppers – diced in inch long pieces – each one half of a medium sized one
Onion – diced in thin pieces, 1 medium
Garlic cloves – diced/crushed – 8-10
Dried Thyme – 2 tsp
Red chilli flakes – 1.5 tsp
Sea Salt – 1.5 tsp or to taste
Long grained rice (or Basmati) – 1 cup
Olive oil – 1 tbsp

IMG_8999


Instructions

Wash the rice , and let it drain in a sieve.

Heat the olive oil in a pan and sauté the onions and garlic. Once they turn to a brown colour, add the pepper slices to this and sauté them too.

Add the rice to this mixture, and sauté this for 5 mins, on a medium flame. Add thyme and chilli flakes now and mix well, but very carefully to not break the rice grains.

Add the tomato puree and boiling water. Cook on high flame till this boils, and cook on a low flame till the rice is completely cooked.

Garnish with cilantro leaves, if required. But serve hot. Super hot!

Jan 23, 2012

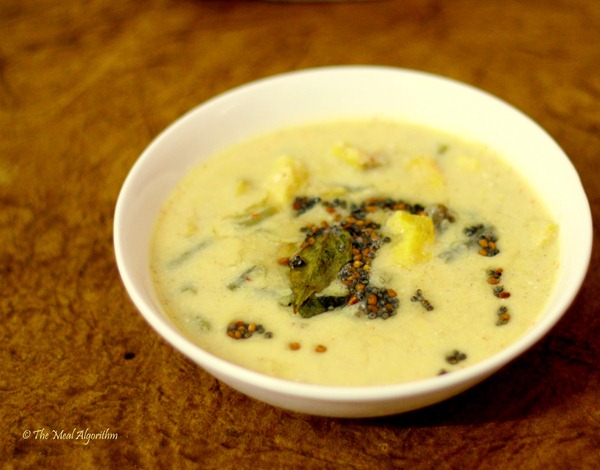
Majjige Huli (Kodakene)


All that talk about different cultures, traditions and idiosyncrasies associate with each community at work today (oh yes, we talk all this stuff and much more in my team, one heck of a fun team it is!) made me all nostalgic.

Like how if you are attending a lunch at a Shivalli Brahmin household, you will not see any dal, and the course starts with Saaru, and with a dozen or so sweets. Or how any outsider would freak out when he/she attends a lunch because of all the shirtless, potbellied , old men talking in the fastest Tulu possible in the loudest voice allowed.

Well, I’ve always maintained that, if only the population of the Tulu speaking Shivalli community was a little higher, and we were not scattered as we are now, we would’ve become a famous community by now, like all those Punjus, Gujjus or Mallus. You will see a Udupi hotel in nearly every corner of the world, well almost, but there will be just one or two of them. That’s how scattered my community is. All of us cling to our roots with a strong hope by refusing to speak any other language except Tulu among ourselves, jump with joy and behave like long lost cousins exchanging family names and relatives when we hear anyone speaking the slightest of Tulu, using up one coconut a day for all our dishes, sticking to our saaru da pudi recipes staunchly, thinking of the good times had while eating Gujje bajji, Shavige, Patrode or Pelakkayi Gatti, and looking out in the markets for Manjalu da Ire (Turmeric leaf) for our moodes.

We all know that its hard to stick to our culture, especially if you are not married to a Shivalli person, and don’t speak your mother tongue on a daily basis and so do our best to retain our homes in our kitchens. Ooh yes, I am missing my roots. Everything about them. My mother tongue, my native place, the smells in Mom’s kitchen and the food I grew up on. I felt the urge to be in touch with them all.

One such attempt is tonight’s dinner attempt. By the time I was getting home, I was yearning for something Mangalorean to eat, something from my Mom’s kitchen and something that I love.

Kodakene (in Tulu) or Majjige Huli (in Kannada) is a Kannada dish, but as for every dish , there is a Mangalorean twist to this, I am told. Mom tells me that I am not to add any spice to this except green chilli. She just allowed one red chilli for the colour of the masala, which I adhered to.  She asked me to not use desiccated coconut imploring that it is sacrilege to do that and gave me strict instructions on how to cook the vegetables - that I should cook the okras in butter milk, if I am using them. And that I should only cook the winter melons for one whistle in the pressure cooker, and not more. And options to thicken the yogurt sauce with rawa or soaked cashew nuts. Armed with all those instructions, I started off to cook my most favourite Mangalorean dish.

IMG_8955

Ingredients

For the masala
Fresh Coconut – 1/4 cup, chopped
Green chilli – 1
Red chilli – 1
Wheat rawa – 1/8 cup, soaked in water for atleast 15 mins

For the Huli
Yam – cleaned and chopped in inch pieces – 3/4 cup
French Beans – diced in inch pieces – 1/2 cup
Thick yogurt – 1.5 Cup
Salt to taste

For the tempering
Ghee – 1 tbsp
Mustard seeds – 1 tsp
Methi seeds – 1 tsp
Curry leaves – 4-5

Instructions

Pressure cook the beans and yam pieces with some salt.

Mix the ingredients for the masala into a thick paste.

Mix the masala and yogurt with the cooked vegetables. Heat this mixture on the stove till it boils once. To achieve the desired consistency, use water, preferably from the cooked vegetables.

Heat the ghee, and add the curry leaves, mustard and methi seeds to this.

Add this tempering to the Kodakene and eat it with hot rice.

You can use almost any vegetable to make this, provided it is cooked in the method it has to be. (Okra with butter milk, egg plants in oil etc) . This dish is primarily to be eaten with rice, but can also be eaten with Rotti (a Mangalorean dosa).

Jan 19, 2012

Roasted Tomato & Fennel soup, for those Brrrr evenings…


Now, having Tomato soup on a cold evening is nothing new. [By the way, Hyderabad is undergoing a serious identity crisis. Its like its trying to be both Shimla and Hyderabad at the same time, what with the temperatures hitting 10 Celsius and all!]

IMG_8926

I had a nice fennel bulb at hand, something whose flavour I absolutely love and wanted to preserve in the dish I make. And then I also wanted to have the tangy taste of the tomatoes in the soup. Which is why I decided to not blend the fennel with the tomato, and preserve it as it is, and roast the tomatoes which ensures that they are cooked and yet the flavour remains intact.
Roasting the tomatoes also happens to be my favourite way to cook a tomato, because of its ease in cooking and the ash-flavour mixed with the tanginess.

I used some basic herbs to give some flavour to this soup, you can change these herbs to suite your taste. Also, instead of topping the coriander leaves as garnish, I let the soup cook with these leaves for a while to ensure that there is a faint coriander smell to the soup. You can opt to use it as garnish too.

=

Ingredients
Tomatoes , medium sized – 4
Fennel bulb – 1, cleaned and chopped as fine as possible
Garlic cloves – 8-10, chopped fine
Dried Oregano – 1/2 tsp
Dried Basil – 1/2 tsp
Red Chilli flakes – 1/2 tsp
Ground pepper – 1/2 tsp
Coriander leaves – a bunch
Salt – To taste
Olive oil – 1/2 tbsp

IMG_8921

Instructions

Pierce a fork into the tomatoes and hold them on the open flame of the stove. Tilt and twist the fork to ensure that all sides of the tomato is getting roasted. After a while, you will  hear  pop sounds, and the skin of the tomato like it is having blisters. This means, the tomato is cooked.

Repeat this for all the tomatoes. Let them cool, and peel off the skin of these tomatoes.
Blend them in a mixer-grinder to make a tomato puree.

In a pan, heat the oil, and sauté the chopped fennel and garlic . Add the rest of the ingredients to this, and let the fennel cook/sauté.

Add the tomato puree, some water and salt to taste, and let this boil. Add the chopped coriander leaves, and let the soup cook with the leaves in it.

Top with pepper and serve hot.

I had some cold soup and it tasted great too. So I guess, that's another option

Jan 18, 2012

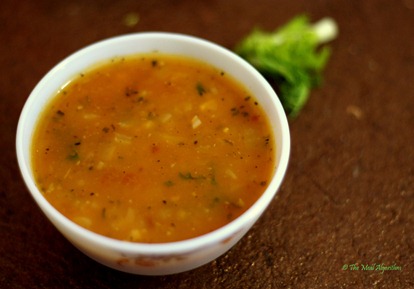
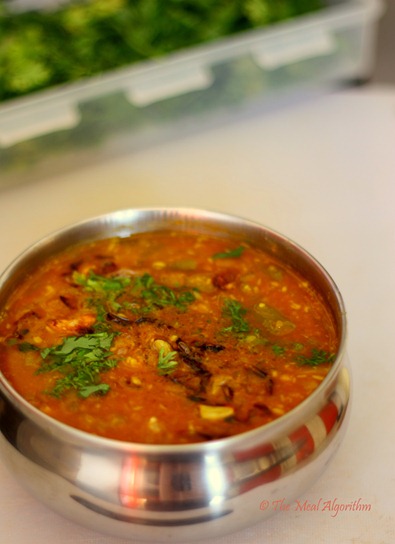
The Essentials –Sambar

Idli-Sambar. Vada-Sambar. Sambar Rice. Masala Dosa with Sambar.
IMG_8885
Just talking about it is enough to activate those taste-buds!
Oh, this dish is an absolute essential in all South-Indian homes.
Be it as a side-dish for breakfast, or in the main course to be eaten with rice, Sambar is almost a staple.
There are different varieties of Sambar, the one you eat for breakfast are different from the ones that are eaten with rice. There can be variations in the tempering you add to this, thus altering the taste altogether. There are Telugu, Kannada and Tamil Sambars.
There is a thin difference between Rasam and Sambar, depending on the masala you use, vegetables you add, and the inclusion of dal.
And then, there is a Mangalorean variety of Sambar called Paji-Masala-Kodyelu, which uses uncooked masala in it, which I am going to try one of these days. Well, for me, its no fun cooking if I don’t have fresh Jeegujje (Bread fruit, apparently, in English. This one belongs to the jackfruit family, but is much smaller in size), but I’ll still make an attempt.
The Telugu variety of Sambar can also be called as Pappu-Chaaru, something which does not always use a mixed-masala.
This recipe for the Sambar I tried is a Mangalorean , Shivalli variety, to be eaten with Idli, Vada or Dosa. It is not advised to mess with the recipe of sambar but I tried making it with the ingredients that are easily available, and not the ones that require a lot of prior planning. Desiccated coconut instead of grated fresh coconut, store-bought sambar powder instead of Mom’s powder or the one you make fresh, and the vegetables that I had at hand. As for the veggies, you can totally pick and choose what you want. Vegetables like Potato, beans and carrot go well for the sambar. I’ve never eaten a sambar with cauliflower in it, but you can give it a try.
I use the tamarind paste that Mom makes for me, you can use the Dabur Homemade stuff, or make it yourself. Instead, just soak up a fistful of tamarind in hot water for 30 mins, and squeeze it to result tamarind water. This can be used in the sambar in an appropriate quantity.
IMG_8865
Ingredients (Makes enough for 40 Idlis)French beans – chopped in inch-sized pieces – 250 gm
Tomatoes – medium sized , 4 , cut into large pieces
Green peas – 1/2 C (thawed if frozen)
Onions – medium sized, 2, diced
Desiccated coconut – 3 tbsp
Jaggery – 1/8 C
Thick Tamarind paste – 3 tbsp
MTR Sambar powder – 4 tbsp
Toor Dal – 1/2 C, washed
Salt – to taste
Red chilli powder – 1/2 tsp
Turmeric – 1/2 tsp

Sunflower oil – 1 tbsp
Garlic cloves – 8-10, crushed/chopped
Coriander leaves – For garnish
InstructionsPut the cut tomato pieces in the same vessel as the washed toor dal. In another dish, put half the amount of diced onions, beans, peas and any other vegetables that are being used and pressure cook all of this together.
Once the dal cools, using a hand blender or a masher, mix the cooked tomatoes and dal together, till they are mashed well.
Pour this toor dal + tomato mixture in a deep , thick bottomed pan. Add tamarind paste, jaggery, desiccated coconut, turmeric, red chilli powder and half the quantity of the sambar powder. Bring this to a boil, and add the cooked vegetables to this. Add salt per taste, and let this mixture boil.
Now check the taste and add more Sambar powder if required. Let this mixture keep boiling.

In another small pan, heat the oil, and sauté the remaining onions with the crushed garlic. Once these turn golden brown, add these to the Sambar.
Garnish with coriander leaves and serve hot with the main dish.

Jan 14, 2012

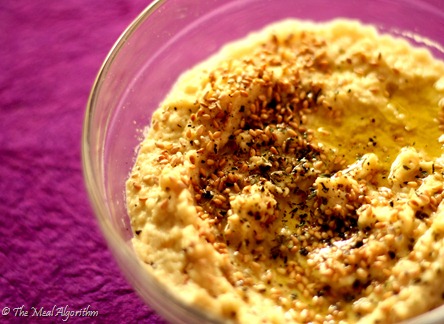
That beauty called Hummus!


As I was licking it away with Rotis today, I realized that I don’t have a recipe of Hummus on my blog. And which self-respecting blog doesn’t have the recipe for Hummus, tell me? :)

And so, here it is!
The much spoken about, the most loved , the healthiest and the easiest dip ever – HUMMUS!
Ta da!

Now, the recipe for hummus itself doesn’t differ from blog to blog , its the same all over. What might differ is what is added to the hummus to get a flavour after its done. I have some ideas towards the end of this post.

Ingredients(For two people, for two days)
Chick Peas – 1/2 C, soaked overnight in water
Garlic cloves – 8-10
Extra virgin olive oil – generous quantities
Sea salt – to taste
Lime juice – juice of half a lemon

IMG_8834

Instructions
Pressure cook the chick-peas till they are soft.
Once the peas are cooled, in a mixer blender, blend all the ingredients. Drizzle olive oil to enable the blending.
The resultant mixture should have a smooth texture.

Ideas
1. I have a recipe book which talks about adding some yogurt to the chick peas while blending it. Though I am yet to try this version, its a good idea. Certainly ups the health quotient of the dip, and adds a certain tangy flavour too
2. There is a variant of Hummus which is flavoured with basil pesto. Either you can swirl in pesto after the hummus is made or blend the chick-peas with basil leaves while preparing the hummus
3. Garnish Ideas – Parsley, Red paprika powder, Ground pepper, Extra virgin olive oil, Toasted sesame seeds – Any or all of these together give a great taste to the Hummus
4. Hummus can be used as a dip for crackers, side-dish for rotis, or with bread for sandwiches.
5. I have once eaten a version of Hummus which used sesame oil instead of olive oil while blending the peas. Great flavour. And healthy too.

Jan 11, 2012

Garden Salad, with honey dressing

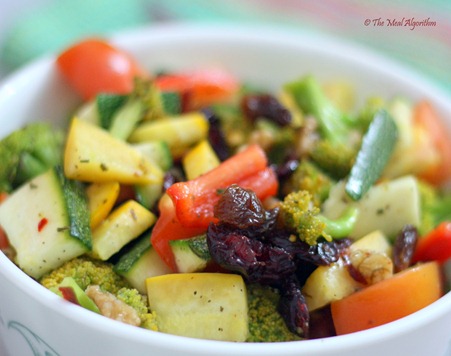
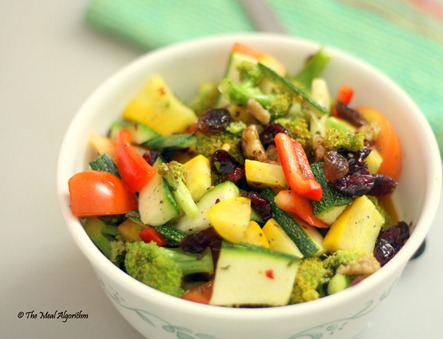
Yet another meal for one, and with all the fresh vegetables in the fridge, I decided to make salad. That way the only way I could use them all at once, without them going bad. I searched around online for dressing ideas, for something involving honey. A dash of lime, lot of honey, some olive oil and lots of herbs to pep up this dressing, and the salad was brilliant. It must’ve been the choice of vegetables, nuts and berries I used, but I loved this salad. And this dressing too.

IMG_8798

Ingredients
For the Salad
Zucchini – 1, chopped in inch sized pieces
Broccoli – 1 , cut into florets
Tomato  – 2, chopped in big chunks
Bell pepper – 1, chopped into longish inch sized pieces
Raisins – a handful
Walnuts – a handful
Cranberries – a handful

For the dressing
Olive oil – 1 tbsp
Lemon juice – juice of one lemon
Honey – 2 tbsp
Basil – 1 tsp
Oregano – 1 tsp
Ground pepper – 1 tsp
Chilli flakes – 1 tsp
Salt – To taste

IMG_8791

Ingredients

Mix the dressing ingredients, and toss the salad ingredients along with the dressing in a salad bowl.

Jan 10, 2012

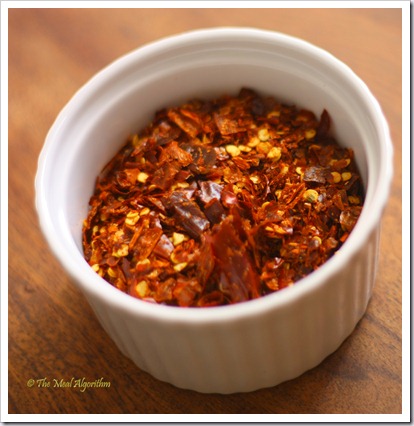
Make your own Chilli Flakes!


Am sure Domestic-Goddesses have been doing this since forever, but I just bumped into this idea, and so, here it is.

Every time my Mother-in-law visits, she makes some podis for her son – KaarraPodi, KandiPodi, ChutneyPodi. And after all those podis are done, there is always a surplus of red chillis in the house, which I almost never use. Using it in the tadkas also will take me atleast two years to completely use up all the chillis we stock.

And so I thought I’d roast them a bit, and make my own batch of chilli flakes. For the non-Indian food.

IMG_8777

Instructions

Place the red chillis on a baking tray, and grill them for 3 minutes, or till you smell the chillis in the kitchen. :-)
Put them in a mixer-grinder jar and run them under the incher. Just once.
Just enough to mince them but not grind them.
Store in an airtight container.

Jan 8, 2012

Pesto!


The first time I ate risotto with pesto swirled in at N’s house is a memorable day. It was like the food was singing to me, in a very pesto-ish tone, and a green hue. Yes, its possible to feel all this and much more with food. Especially, with anything related to basil. Its like smelling spring. Somehow reminding me of childhood(though Italian Basil didn’t feature in my childhood food stories, that’s the whole magic!).

The first time I made my own batch of pesto was another memorable day. Those were the initial days of me getting back into my kitchen, and the minute I made the pesto batch , I felt a very gloating Domestic Goddess like feeling, something was swelling in my heart, and something was smelling good in my house, wait , that has to be the fresh smell of Basil in my house! :-)

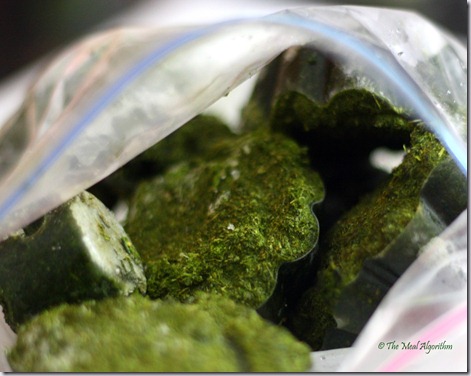
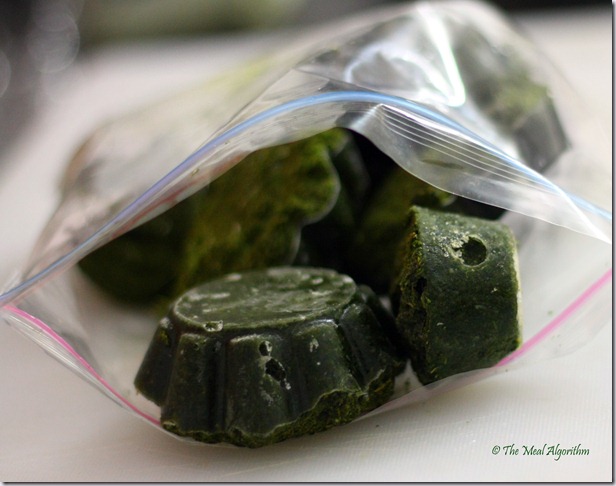
I’ve made pesto in smaller quantities ever since, but only off late did I start making big batches of pesto, and started freezing them in ice-trays. To eliminate any chance of my pesto ruining itself and catching fungus. And to ensure that I have pesto stashed anytime of the month/year. Its not like we have to freeze all our herbs in India, but Italian Basil is still not available in abundance here, and hence these desperate measures.

If you are an Indian, especially a South Indian and are used to make those chutneys for the Idlis and Dosas , then you are already half-familiar with the pesto making process. It is basically a basil based chutney. But with cheese. There are many variations of Pesto. You can refer to these links for some of them -

Jamie’s Pesto
Nags’ pesto recipe

Pesto.

Ingredients
Basil leaves – Washed, a bunch
Pine nuts – Toasted, a handful
Extra virgin olive oil – 4-5 tbsps
Garlic – 2-4 cloves
Sea salt – to taste

Instructions
Ground all the ingredients in a mixer-grinder , drizzling the olive oil generously. The resultant mixture should have a smooth texture.
Pour scoops of this into the ice-tray and freeze it. Once frozen, remove them and store in zip lock bags for future use.

IMG_8756

Use one cube of pesto while cooking a meal for two.

Note
1. There are some variations of pesto in which you can use toasted almonds instead of pine nuts.
2. You can do away with the parmesan cheese. Its quite expensive in India, and I prefer it fresh on my pasta, not in the pesto. I don’t normally put any cheese in my pesto.

Jan 7, 2012

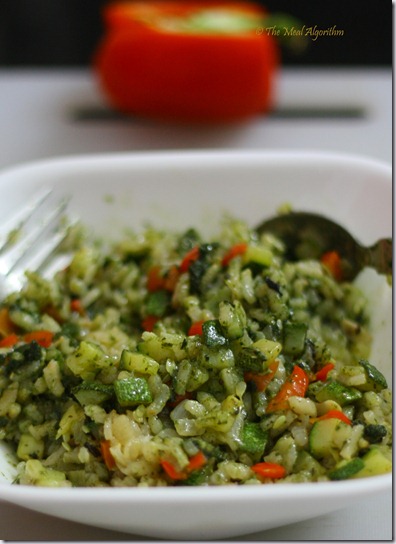
Risotto. For a change…

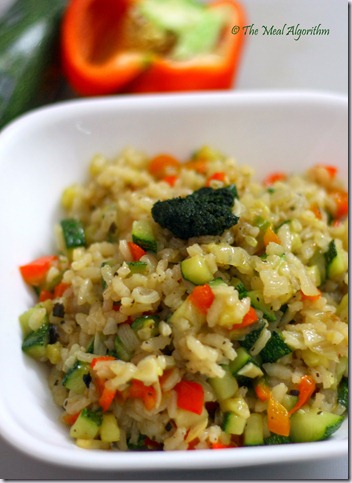
Last night, for once, I didn’t want to eat pasta. I wanted something else for a change. But then what to do with all the fresh zucchini and the pesto I have. I had to do something Italian, but not pasta. Some asking around on Twitter for recipe ideas (Yes, that’s in these days! :-P), and risotto, it was. That way I could also use up some of the Arborio rice I had stashed away almost an year ago.

The last time I made the risotto, I was slightly put off by the creamy texture it held. Yes, I know, its weird that I didn’t like risotto for the very taste it is known for. I had used wine and vegetable stock then, but this time I decided to do away with all that. It would be with plain hot water, and no cheese. I know this one is beginning to sound like a bit of an Indian rice preparation, but blame it on the Indian roots , I was craving for that. For some reason, cooking with zucchini and pesto and Sona Masoori rice wasn’t on, and hence the Arborio rice usage, and hence the vague resemblance to risotto. :-)

Ingredients (Serves one very generously)
Arborio rice – 1/3 cup
Zucchini – 1/2 of a medium sized one, chopped with the skin on for all the pieces
Red bell pepper – 1/2 of a medium sized one, chopped into one cm big pieces
Onion – 1 medium sized , chopped fine
Garlic cloves – 5-6, chopped very fine lengthwise
Dried Sage/Thyme – 1 tbsp, or any herb of your choice
Ground Black pepper – 1 tbsp
Sea Salt – To taste
Boiling water – 1.5 cups
Basil pesto – fresh or frozen – 1 tbsp or one ice-cube
Olive oil – 1/2 + 1/2  tbsp

IMG_8759


Instructions
In a deep pan, heat one half of the olive oil and sauté the onions and some garlic. Once they are softened, add the rice and sauté till the rice is covered with the oil. Add half a cup of the boiling water to this, mix and let it be on medium heat for 5 minutes. Once this water is absorbed by the rice, add some more water and let it be on heat for another 5 mins till this water is absorbed too. Add salt to taste. Repeat this step 4-5 times, till the quantity of rice increases, rice is cooked but still does not resemble a pulp. Once cooked, close this pan and let this rice sit for 10 mins.

Now prepare the vegetables. In another pan, heat the remaining olive oil, add the garlic and the herbs , pepper and sauté the zucchini and pepper till they are soft and cooked. Add salt to taste.

IMG_8771

Once the vegetables are prepared mix the rice with the vegetables, and swirl the pesto into this mixture at the end.

Serve hot.

Jan 6, 2012

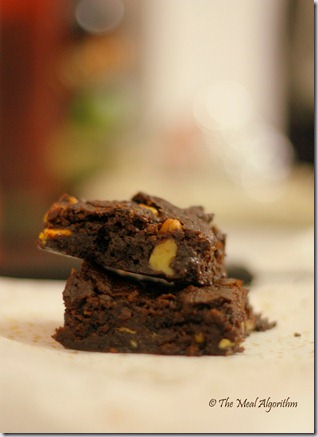
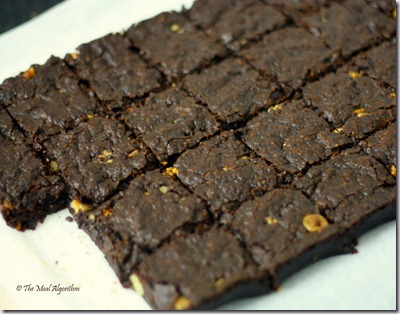
Chocolate Fudge Brownie

Brownies are an all-time favourite in our house. So is it with my friends also. I have had a very reliable brownie recipe all along, but I felt the need to eliminate other flavours from this and make a plain chocolate brownie, for when the chocolate craving hits.
Here’s a little silly rhyme to go with the whole brownie experience …

Hop and skip in a loop,
Pair with a vanilla scoop.
Its that easy,
Warm this beauty.
Eat it as you lick your lips
And watch it grow on your hips! ;-)

IMG_8746

Ingredients
100 gms butter
1 cup cocoa powder
1 3/4 cups sugar
1/2 tsp salt
8 tbsps thick cream
1 1/3 cup AP flour
1/2 cup chopped Walnuts/White chocolate chips (optional)

IMG_8731

Instructions
Melt the butter in a pan. Once this cools down, whisk the cocoa powder into butter.
Add the cream and mix thoroughly. And now blend in the sugar into this mixture.
Whisk flour into this mixture and mix well. Fold in the nuts in the end.

IMG_8732

Pour this brownie batter in a greased 9x4 tin and bake in a pre-heated oven for at least 30 mins.
Once it cools, cut and store in airtight containers.

Jan 5, 2012

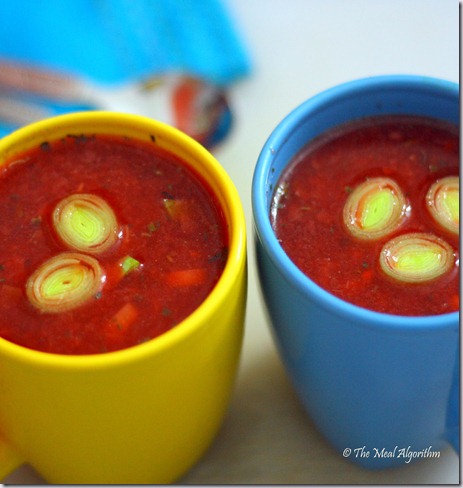
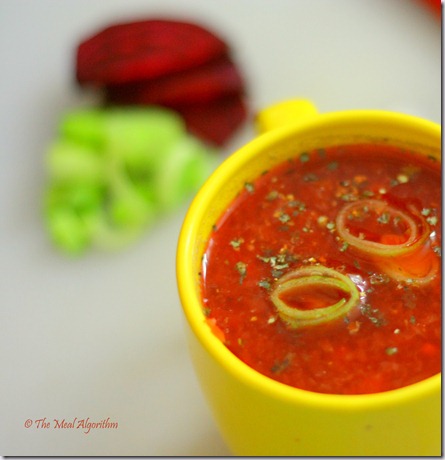
Leek + Beetroot in a soup!


Beetroot is not a favourite vegetable at all. For a long time, I tried incorporating it into the meal, hiding it in rotis, and curries, but the ever-smart husband would always identify the faint smell of beet being cooked in the house. And would refuse to eat two consecutive meals in the house.
Those were the days I was trying to please him, and so wouldn’t cook anything he wouldn’t eat, even if it is the most healthiest of foods. But with the grey hair and wisdom I’ve acquired over these years, that’s not the case anymore. Lets just say that he eats whatever is made if he knows it is healthy. No more tantrums. :)
<mush alert>
[I shot this pic as a symbolic way to represent both of us. A long mush story can follow, but I’ll save y’all from that]
</mush alert>

IMG_8724
As a part of re-introducing the vegetable back into the household, I decided to do a simple soup. It would go with the winter weather, I’d get to use the leek I bought last week, and there would be a beautiful red colour in the soup too, making it look great. [The last one is a very lame reason, and wasn’t even a factor for this soup, but what stops me from putting it up here… :-P]
Ingredients
Beetroot – 1 , chopped into small pieces
Cabbage – 1/2 cup, chopped into small pieces
Leek – 1 stalk, chopped either in round slices or inch-sized pieces
Dried mint – 1 tbsp
Dried Thyme – 1 tbsp
Ground Pepper – 1 tbsp
Salt – To taste
Olive oil – 1 tbsp
Garlic – 4-5 cloves, chopped fine
Ginger – 1 inch piece, chopped fine
IMG_8719

Instructions
Pressure cook both beetroot and cabbage together. Once this cools, using a blender, mash them into a thick pulp.
In a pan, heat the olive oil and sauté the garlic and ginger together. Add half the amount of thyme and mint to this and sauté them all together.
Add the vegetable pulp , some water, salt and pepper to the oil and bring this to a boil.
Check if this is soup consistency, and add water if required.
Garnish with the remaining thyme and mint, and serve hot.

Jan 4, 2012

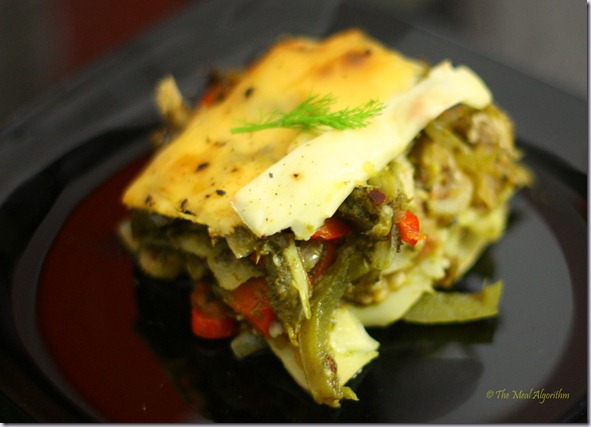
Lasagne , with Fennel-Aubergine …

And Pepper-Pesto base! Sounds awesome, no? :-)

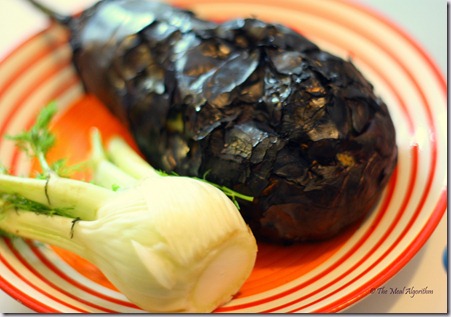
The first ever time I tried roasted aubergine (eggplant or brinjal as it is known in India), I fell in love. With the burnt taste that lingers even after you peel off the burnt skin from the vegetable. Trust me, for all my culinary escapades (all 3 of them!:-P), I haven’t made Baingan ka Bharta before, and when the cook made an awesome job at it this week, it was like I rediscovered the taste of roasted brinjal all over again.

And when I spotted the fresh Fennel bulb in the grocery counter last week, I decided to marry these tastes. Fennel with roasted aubergine, that is. And it had to be with pasta.

I’ve already done the pasta with roasted aubergine in the base , so this time I wanted to try it as a filling in Lasagne. And to alternate it , I used some left over Pepper-Pesto base from the Pasta with pesto recipe.

Fennel with Roasted Aubergine combined with Peppers in pesto sauce , it was going to be. A total medley of flavours , no?

IMG_8695

Ingredients (Serves 2)

Fennel Bulb – 1, washed and chopped to 1/2 cm pieces
Eggplant – 1 big, stove roasted and skin peeled off , chopped
Garlic cloves – 4-5 crushed
Olive oil – 1 tbsp
Dill – 1/2 tbsp
Sage – 1/2 tbsp
Pepper-pesto curry – Recipe from here – 2 cups
Lasagne sheets – 6 sheets, cooked and dried per instructions on the box
Cheddar cheese – 3-4 slices, enough to cover the lasagne in the last layer

IMG_8710
Instructions

Prepare the garlic, aubergine and fennel pieces together by sautéing them in olive oil till the fennel is soft, and aubergine is mashed. Add some Dill and Sage to this while sautéing to give a herb-y flavour to the base. This should be a thick yet spread-able paste.

Grease an oven-proof bowl with a little olive oil, and pour one thin layer of the Aubergine-Fennel. Place the lasagne sheets , Pepper-Pesto base and the roasted aubergine-fennel base alternatively in the bowl. Top it with cheese.

Bake this in a pre-heated oven at 200C for 30 mins, or till the cheese becomes a golden brown on top.

Cut , garnish with pepper , sage or dill if required, and serve hot.

Jan 1, 2012

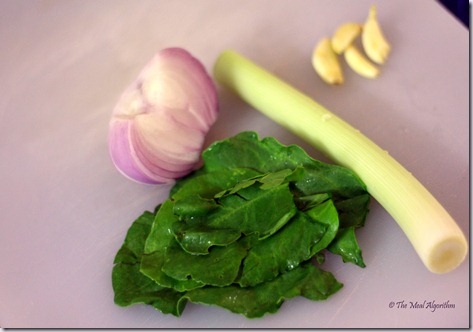
Spinach & Leek Soup


Leek was something I’ve only read about being used in soups. Every time I see a recipe which had leek in it, I’d imagine an onion like taste for a spring-onion like vegetable and carry on reading the recipe. Until last week.

Most recipes I read about leeks in soups also had spinach leaves in it. I leafed through my new soup cook book , and came across some without spinach too, but that was for another day. Here is a recipe I concocted , with some inspiration from one of the recipes from this book -

Ingredients

IMG_8689

Leek – 1 stalk, washed and cut into 1 inch wide pieces
Spinach leaves – 1 bunch, washed and chopped
Onion – Medium sized , chopped fine
Garlic cloves – 4-5, chopped/crushed
Sage – 1 tbsp
Olive oil – 1 tbsp
Sea salt – To taste
Boiling water – 1 cup

IMG_8701

Instructions

In a deep pan, heat the olive oil, and sauté the crushed/chopped garlic. Once the entire kitchen is filled up with the aroma of this sautéed garlic, add onions to this, and sauté this too.

When the onions are close to getting pink, add sage and sauté a bit more. Now add the leek, and the spinach leaves, and sauté them all together. At this point, the oil we initially used is not enough to for all these vegetables, but there is no need to add more oil. The idea is to half-sauté and half-boil these vegetables.

Pour the boiling water, and let the vegetables boil till they are tender. Add some salt, and let this cool.

Once this mixture is a little cool, blend this into a paste using a hand blender.

Put this back on the stove, add more water to suit the soup consistency and bring it to a boil.

Serve hot, with crushed pepper for garnish.