Nov 28, 2010

Oven-dried Tomatoes


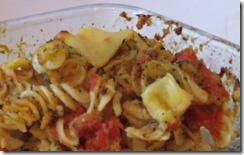
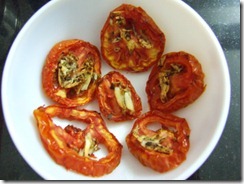
The other day I was blog-hopping and bumped into this post by PurpleFoodie. Having always loved the taste of sun-dried tomatoes, I immediately tried this on half-a dozen tomatoes that I had in the fridge, and lo.. they were ready – my own first batch of oven-dried tomatoes.

DSCF7365

They tasted awesome, and yes, this was what was left by the time I got around to photograph them. That is a testimony of how good they were! :) I haven’t used them in a pasta or a pizza yet, but I plan to make another batch soon and use them for that purpose.

The only deterrent, if at all, that can stop me from making these would be the time. It takes atleast 2-3 hrs of prep time, and 2 hrs of electricity and oven running. For all that effort, it seems like a little return :)

Nov 26, 2010

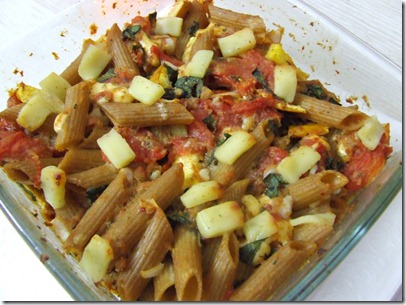
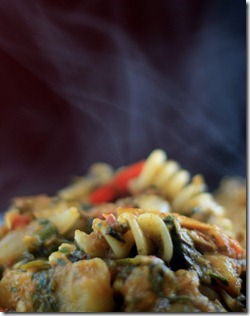
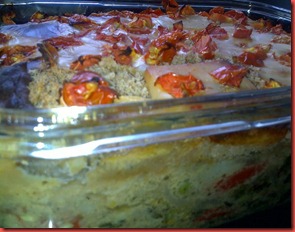
Tomato Pasta Cheese Bake


Readers to this blog, by now would have known my love for anything which would be remotely related to pasta, right? :)

So one evening, I was wondering what to eat, and as usual my mind suggested I make pasta. But having had pasta for the major part of the week, I knew the husband would crib if I fed him the same thing again. Some googling and some imagination led me to this recipe, and I immediately tried it.

And as usual, the husband told me that it was the best pasta I ever baked! :) (He does that for every new pasta recipe I make, always the same words! :))

DSCF7409

Ingredients:

1 5’x5’ baking pan. I used a Borosil glass one
4 tomatoes, cut into quarter pieces
4 tbsp Olive oil
1 tbsp each of Oregano, Sage and Basil dried herbs
1 tbsp chilli flakes
Sea salt – To taste
1 cup boiled and made pasta. I used whole-wheat penne and fusilli.
Britannia Masala Mania cheese cube – 1, cut into pieces
2 tbsp shredded mozzarella cheese
Crumbs out of 1 wheat bread slice

Method:

1. Preheat the oven to 200C
2. Place the quarter-cut tomatoes in the baking pan, sprinkle the herbs , chilli flakes and sea salt on the tomatoes. Drizzle this with the olive oil and bake for about 15-20 mins, or till the tomatoes are cooked, and are mashable
3. Once baked/cooked, mash the tomatoes into a sauce-like paste, with a spoon.
4. Mix the crumbs and the shredded mozzarella into this paste. This would thicken the sauce, if its too watery.
5. Add the cooked pasta into this paste, mix well.
6. Top this with the Britannia cheese pieces. Alternatively you can use cheddar also, but I love the flavours in this cheese, though its processed.
7. Bake for 10 mins, or till the cheese pieces turn into a golden brown. They are a serious treat! :)
8. Enjoy this pasta as it is or with a slice of warm bread.

DSCF7411

The above pic is from the second time, when I used some zucchinis(I cooked them in olive oil and some herbs separately, and added after I mashed the tomatoes) and whole-wheat penne. I loved this version also equally. I even stored it to eat it as breakfast the next day, and it tasted better the next day.

Nov 24, 2010

Winey tales & Winemaking – Day 1


I tasted my first ever home-made wine when I was exactly 18 yrs old. :) It was when my married-cousin(the word married is important here. In our family, girls are allowed to do anything they want only after they are married:) ) decided that I was old enough to have wine, that she shared the wine she made with me, and I, in turn, shared it with my 15-yr old brother. We’d drink it chup-chup-ke coz alcohol and daaru-talk was strictly prohibited in our house and that is how we finished the whole bottle Akka shared with me. But then, Mom always knew we were drinking it, and she surprisingly didn't have a problem with it, may be because she thought that since it was home-made, it wouldn’t be alcoholic or something. Back then, I didn’t know what getting high meant, but looking back now, I am almost sure that did give us a little high. It was either the alcohol in the wine or the sugar-high, but it sure did feel good. Yeah… I started young :P

The next time I drank wine was around 10 yrs later, I fell in love with it. It was the sweet port wine that S got from Goa, and that became my sole reason to visit Goa henceforth. It was the one thing I asked people to get me from Goa, and the only thing I carried every time I visited that place. After this interest in wine, I tried the wines made by the Nasik wine yards, but never quite liked the taste of any of them. All of them were too sweet and acidic to my taste, and I stuck to my port wine, till Sangria happened! :)

The first-ever time I tasted this nectar was in Hong Kong, in one of the organic cafes of Sohos, and that was it! I got hooked. Seeing my excitement every time the word Sangria was uttered, the husband took it upon himself to make Sangria for me at home, and with practice he grew great at it. He also could not get the taste of the Sangria we first had, but nevertheless, it was the best I had in all of Hyd. The juices he mixes to the wines, and the powders to add spice, make it unique and tasty every time he makes it, and this became the preferred way to have wine in our house, for us both and for the guests we entertain.
After that initial escapade with home-made-wine, the thought didnt even cross my head for years. Only when S told me that his aunt was a master-wine-maker, and that she used to supply the whole family with bottles and bottles of her-much-famed-wine, did the thought of making my own wine strike me. On one of the family outings, I asked the dear lady how she did it, and if she would be kind enough to teach me how to make it. She agreed almost immediately, and that got the whole family excited! (Yeah, even I didn’t know we were a family of Bewdas :P ) This talk happened in June 2010, when she was about to leave to the US, and since it wasn’t the right season for grapes, we decided to postpone the grand activity till Dec, when she returns and when the grapes are sweet.

Its almost December now, and she will be coming back soon. As much as I am excited to try it with her, the little imp in me wanted to try her own version of wine. The visit to the farmer’s market yielded in a good purchase of grapes, the time seemed right and hence this attempt.
I was clear on a couple of things before I started to make my wine -

1. I was not going to make the simple recipe that Akka used to make wine with. Hers was to add 1 kg of grapes with 1 kg of sugar and one packet of yeast. And keep it in a plastic bucket for a week, and then sieve it and bottle it. Simple it did sound, but the taste would still be that of grape juice which is not what I wanted.

2. S is allergic to the sulphites in the wine. We discovered this after he fell sick every single time we had wine during our stay in Hong Kong, and with a little research and experimentation, we discovered it had to do with the wine. Hence, I was certain that I was not going to use the sulphite tablets in my wine.
3. All the recipes I read online for wine-making had yeast in it. Now, I wasn’t sure where to get wine yeast in Hyd, and didn’t have the patience to wait till I get it. Since mine is not on an enterprise level, I wanted a recipe which did not use any yeast, and I got this one, which I followed.
I mashed the 1/2 kg grapes with my hands, and removed the seeds as much as I could and filled the juice and pulp into the two broad-mouthed-bottles I had cleaned earlier.
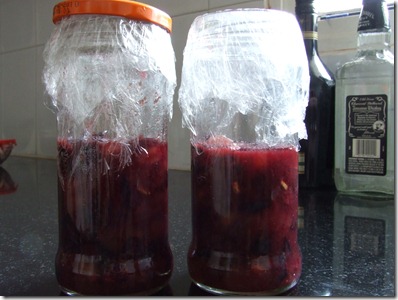
DSCF7422
Fingers-crossed with anticipation, I am going to wait for the juice and pulp to ferment for the 7 days. The next step is to remove the mold, dilute the juice with two parts of distilled water, and add sugar. It would ferment more later. All this fermentation would happen with the yeast and bacteria present in the grapes alone, with nothing external. I love the fact that this would be almost-natural.

Once I see that this step is crossed without any hitches, am gonna get more grapes and start a second batch.
God, please let this experiment passs, and most of all, please give us the restraint to not drink it before its completely done. That is for the next couple of months! Sigh! :)

Nov 23, 2010

Guava Kebab


Growing up, guava is the least favourite of all the fruits in our house. We all knew that it was good for health and all, but the seedy and hard texture of the fruit,and its near-neutral taste have been huge turn-offs forever. The only variety that was given any interest was the one with pink center, but that too was for the looks and never the taste. As I grew up, and read up on the nutrients in this fruit, I kept on thinking on how to include it in the diet atleast once in a week, and this dish came as a total pleasant-life-saver-surprise for that need.

The other day, I was lunching at the Great Indian Kebab Factory with my team. It was the lunch buffet, and that was when I tasted this dish. It was called fruit chat, and he served Pineapple and Guava grilled in some masala. It wasn’t the first time I was eating pineapple as a savoury (I’ve always loved the smoked pineapple panna at Sahib Sindh Sultan and the pineapple-vodka pizza in Little Italy) but eating a savoury version of guava was a total bumper. And my, did I love it. I asked for a second, third and a fourth helping of the guava pieces, and even licked my fingers as I finished it. I loved it so much that the taste stuck to my tongue, and my mind started wondering how exactly it was made.

This evening, fresh from my outing at the farmer’s market, I had a couple of good guavas at hand, and lots of time to try something new too. Giving some reins to the imagination, I quickly made a marinade of whatever nice and spicy was at hand, and cut the guava into pieces, and grilled it. The result was a lip-smacking kebab, which though didnt taste like the one I ate at the TGIKF, but was good to be served as a starter when friends come over.

DSCF7429

Ingredients:

1 measure cumin powder
1 measure coriander powder
1/2 measure dry ginger powder
1/2 measure chilli powder
Sea salt – to taste
Orange juice – just enough to make a paste out of the above ingredients
1 guava – cut to 1 inch pieces

Method:
1. Pre-heat the over to 215C
2. Mix all the above ingredients except guava into a thick paste.
3. Put the guava pieces into the paste, and roll it, so that the paste coats the piece. You can also marinate the guava in the paste for 2-3 hrs.
4. In a baking tray , bake these pieces at 200C for 15 mins.
5. Let it cool for a minute or two, and dig in ! :)

Variations:
You can also add ginger-garlic paste, green-chilli-coriander paste also to the marinate , but in my opinion, the paste should be tangy in taste. Only then the chatpata-flavor of the kebab will burst in your mouth as you eat it.

Oct 29, 2010

Thai Yellow Curry


Its a funny story on when I tasted my first ever Thai khana. Well, it was not when I was travelling in Bangkok, though I could’ve had the authentic best there. The fear of everything being mixed with oyster sauce scared the vegetarian-me so much , that all the days that we were in Thailand, we went looking for an Indian restaurant, and ate Alu Paratha – all 3 times a day, for almost a week. Yes, shame on us.

And after I came back, I bumped into blog posts stating how awesome Thai food is and how tasty the street food there is. Well, that was when I felt a real heartburn ! :) A very valuable lesson learnt from the foolishness displayed in the Land of Smiles was that, no matter how it is, we have decided to try the local cuisine. Or atleast not search maniacally for Indian restaurants.

So when we saw that Hydie had its first own Thai restaurant, Isda Thai, we dined there almost immediately. The ambience was awesome, so was the food. What I loved the best is that they had veggie options for every dish on the menu. It felt like paradise. Thats where I ate my first ever red, yellow and green curries. And fell in love with the spices used in them. Since then, it had been a dream to make Thai food!

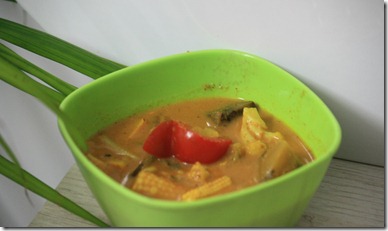
When I saw this recipe by Arundati, I tried it right away. Yellow Curry with white rice – Made a pretty picture on the plate.

Followed most of the steps in the recipe to the T, but made some minor changes to it, because of lack of ingredients, and reluctance to use some :)

IMG_6139

1. I did not use the oyster mushroom sauce. I know its vegetarian, but blame it on the word ‘oyster’!
2. Didn’t find baby bok chok anywhere, and so omitted that. Could’ve substituted that with spinach as advised by Arundati and Nandita, but didnt have that too handy.
3. Had just cauliflowers, red & yellow peppers and one small zucchini.

As I was making the yellow paste ready, I could not help notice the uncanny resemblances between a Mangalorean dish called ''Kodyelu’ and this paste. They have the same basic ingredients(cumin, coconut milk and coriander) , and Yellow curry paste has a few more exotic ones.

What I made might not be an exact Thai Yellow curry, but we loved the spice in this, and the taste overall. And it totally appealed to the husband who loves anything that can be eaten with white rice!

Oct 27, 2010

Pasta with red sauce


As already wrote here, pasta is my ever favourite food to eat. Its something I cook when I am bored or when I am feeling excited or when I have time to cook or when I am too busy – just about anytime.

I used to buy the canned red sauce by Barilla and make the pasta before, but after bumping into a ton of recipes on the net for it, I decided to make my own. Now, there is nothing new in my recipe, but I just tweak around the ingredients, the quantity of the herbs to suit our palate and cut through some long routes :) . The result is always a good pasta, but something I can never replicate, because of the runtime alterations I do to the recipes.


IMG_5925

I am sure I am not going to follow the same recipe the next time I make pasta, but this is the basic framework with which I am going to work around :). The changes I do are generally with the herbs, the
This recipe has more vegetables than is generally found in a regular pasta, and serves two for dinner.

Ingredients & Procedure:

For the sauce:
2 medium sized onions, chopped
4 large tomatoes, chopped
2 green chillies, diced
6 cloves garlic, crushed
2 tbsps olive oil
Salt to taste
1 tsp each of Oregano and basil

In a pan, heat the oil on medium flame and put in the chillies and crushed garlic. After 2 mins, put the onions in the oil and roast till the onions turn to a pale pink color. Add the herbs to this. Now add the tomatoes to this and let these cook in the oil. After about 5 mins, when the tomatoes are cooked, add the salt, take the pan off the stove and let this mixture cool. Pour in a mixer and blend to a thick red paste.

For the pasta:
2 cups whole-wheat pasta(fusilli, penne or spaghetti), cooked al-dente
1/2 cup each chopped vegetables (green, red and yellow capsicums, zucchinis, cauliflower florets)
1 medium-sized onion, chopped into long pieces
1 cup washed and chopped spinach leaves
2 tbsps olive oil
1 tbsp each Italian herbs (I generally use oregano, thyme, basil, sage)
1 tbsp basil pesto
Salt to taste
2 cups red sauce(made from the recipe given above)

For garnishing:
Cheese grated or diced. (I generally use the Britannia Masala Mania cheese cubes or Cheddar slices)

Heat the oil in a thick bottomed pan and add the onions to this. Add the herbs and basil pesto and let these roast in the oil. Put the capsicums in the pan now, and roast them for 4-5 mins. Now add the other vegetables like cauliflower florets, spinach and zucchinis and cook for another 4-5 mins. Now add the red sauce to this mixture, and let it cook till the sauce boils. Add the salt to taste in this mixture. Add the cooked pasta to this and mix this well, but careful to not crush the veggies.
Garnish with the cheese and serve warm.

Oct 26, 2010

Mamma, am coming home…


Yes, I was going to Mom’s house after 3 months, and during this period I had started baking. Mom, who is someone who has never asked for anything special to eat for herself so far, actually asked me to make something for her.

So the day before I was to leave to her place, I started baking at 7 and finished by 11 :)
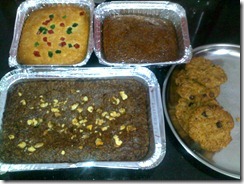
I baked her a Paneer Cake, Ukranian Tea Cake, Chocolate Brownies and Peanut Butter Cookies, and she loved them all! :D

08102010173

Oct 23, 2010

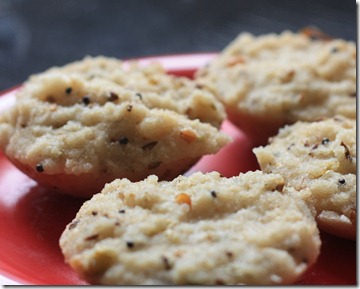
Weekend breakfast–Rawa Idli


Rawa Idli is that dish which, in spite of being a hotelier’s daughter, I have not gotten over. In Mom’s house, I would just have to utter the word Rawa Idli, and Dad would send the piping hot idlis home, but after I moved away and got married, I had to look for sustainable options  to eat this delicacy. One of the was cooking it myself, more because of the husband’s love for all south Indian khana(That man’s ability to eat South Indian food day after day after day without complaining and in fact relishing it is something I am yet to understand!)

One of those weekend mornings early into our marriage and my kitchen days, the husband suggested that I make Rawa Idli for him. Like a dutiful wife, I went to the supermarket, bought the MTR rawa idli mixes and made him the idlis. As usual, he loved them and thats how we started stacking up packets and packets of the mixes.

Life would’ve gone this way happily had I not joined the anti-readymade-food-campaign(God alone knows where I caught it from. My guess is wisdom :) ) and gave away all these packets to the maids. This meant longer hours in the kitchen, more raking of the brains for recipes and varieties of home-cooked meals, and with the small incentive of healthier and tastier food. We, of course, chose the road less taken, and moved to the bright side of food-eating.

Giving away the packets meant, I no longer get to eat the awesome MTR rasam or sambar rice and oh the horror, Rawa Idli also! Well, those were the dire times which pushed me to start making my own rawa idlis. :)

Some reading up and some talking to the women in the family yielded me this recipe, and ever since I started making this, I’ve never got the urge to stock up on the ready-made stuff! Honest!

IMG_6104

The recipe is simple. In two steps, Make dry upma and mix it with sour curd. Yes, that simple! :)

Here is a more detailed recipe, though !

Ingredients:

1 cup Bombay Rawa
1 tsp each of mustard seeds, chana dal, urad dal, jeera
A pinch of hing (Asafoetida)
4-5 crumpled kadi patta
1 green chilli, finely chopped
1 tbsp ginger, finely chopped
2 tbsps refined oil

2 cups sour curd(I leave the curd out of the fridge overnight for breakfast the next day)
A pinch of salt

Procedure:

Heat the oil in the pan on a medium flame, and add the mustard seeds to it. Once the seeds start spluttering, add the chana dala, urad dal and jeera to this. Once all these attain a golden color, add the hing and kadi patta. Now add the chilli and ginger pieces to the oil. Wait till they are a roasted.

Pour the rawa in the pan, and mix with the roasted ingredients. Keep roasting the rawa till you notice the change in smell of the rawa. Its is a nice roasted fragrance which is hard to miss. Take care to not burn the rawa and that its roasted evenly. Let this mixture cool.

At this point, you have two choices. Either mix 2 cups of hot water to this and let it evaporate and eat it like Upma. Or mix this with sour curd and make Rawa idli.

Once you mix this curd, do not let it sit for more than 2-3 mins. This mixture hardens, and you will need to add some water to soften it again, and get it to the batter consistency.

Depending on your method of making idlis, ie either pressure cooker or microwave, grease the idli pans, and pour one spoon each of this mixture into each mould.

I make these in a microwave, and heat the idli mixture for 6 mins at full power.

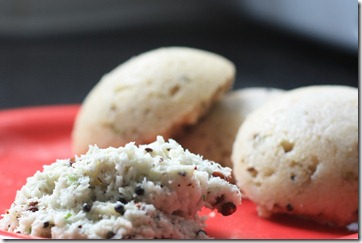
Serve with coconut chutney.

IMG_6106

Oct 22, 2010

Date & Cashew cake


When I was a kid , Mom used to make everything possible in her might to make me drink my evening milk. She used to resort to emotional blackmail, loud screaming, feign ignorance to the fact that I hate the milk and also push that milk glass down my throat. Which kid would love to drink plain milk 4 times a day, that too when there was no sugar added to it, tell me!

Being the strong-willed woman that she is, she always got her way. But she adopted the best of her ways only after about 18 yrs, which we loved. She would make a different milkshake every evening for us(me and my younger brother), and that was something we loved. One of her fave recipes and ours too was the date milkshake. So the minute I saw this cake recipe, I was taken back to the time when we used to fight to finish off the milkshake, this time fondly. She used to soak the dates in milk the previous night and grind it to a paste and then mix it with a larger quantity of milk. This cake has a similar method to make the date mixture.

This weekend was just awesome in terms of the number of cakes baked in my oven. I baked this date cake continuously for three consecutive days, twice for friends and the last time for myself, each time altering the recipe a bit to suit my palate :)

The first time I baked this, I followed the recipe to the T, the second time, I reduced the oil by half and the third time, I baked this with whole wheat flour and with no oil. I got to taste this all three times, and this cake was splendid all the three times. There was a minor difference in texture each time, but something which I could live with.

This is the final recipe that I am going to follow from now for this cake. This recipe yields one 6’ round cake.

Ingredients:

3/4 cup sugar
3/4 cup whole wheat flour
1/2 tsp baking soda
18 dates, de-seeded and chopped
3/4 cup milk
10 cashews chopped into small pieces
1/6 cup oil(if required. Adds density to the cake, but is still perfect without it)

Procedure

Soak the dates in hot milk and boil it for 2-3 mins. When the dates soften, take the milk vessel off the stove and let it cool. Add the sugar to this mixture. After the milk cools, put this in the mixer and grind to a thick paste.

Grease the cake tin with butter and preheat the oven to 200C.

In a large mixing bowl, sieve the flour and baking soda together. Add the date mixture to this, and oil if you are adding it. Mix these two well and add the chopped cashews to this mixture. Pour this paste into the cake tin and  decorate with cashews on top. Bake for 30-40 mins at 200C or till the tester is clean.I bake this at 185C for 30 mins, and at 200C for another 10 mins but this might depend on the oven.

Let it cool and then share with friends. Enjoy!

Each time I baked this cake, I was in no position to take a photo of this one. Either I was giving it away to friends or we just started biting in almost immediately, but I shall put up a pic of this one soon! :)

Recipe Courtesy: Aayi’s Recipes

Oct 20, 2010

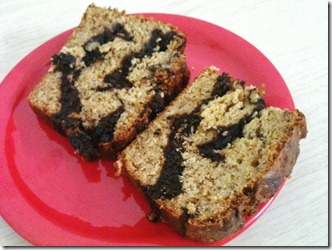
Marbled Banana Chocolate Bread


With this, I feel arrived! Honestly! :)

After baking the Banana choco-chip cake and loving how it tasted, all I could think was to bake Marble Banana Chocolate bread. Since morning, the procedure to do it was running on my head. The visions of chocolate and banana batter mixing with each other were playing havoc with my mind! The bread wouldnt just leave me alone. I thought of it as I was tadka-dalofying to my dal, as I was driving and as I was having my breakfast. It just had to be baked! I just wasnt sure of the quantities. And earlier experiments have shown that baking without proper ingredients is not good for one’s own sanity! :)

So some search on the internet and I bumped into this recipe. What I totally loved about this recipe was that the procedure and the ingredients I had in mind were exactly these, and it can easily be adapted to be egg-less! :D

As I was baking this a sweet smell engulfed my kitchen and I wished over and over again that I should’ve been able to bottle up the fragrance and let it out later… yes, it was that awesome! Like they show in the advertisements :)

photo

So here it is, Marbled Banana Chocolate Bread -

Ingredients:

2 cups all-purpose flour(I used 1:1 ratio of whole wheat and AP flour)
3/4 teaspoon baking soda
1/2 teaspoon salt
1 cup granulated sugar
1/4 cup (1/2 stick/2 oz/56g) butter, softened
3 Bananas. Ripe and mashed. (This should be about 1 cup)
4 tbsps yogurt (or 2 eggs)
1/3 cup plain yogurt
1/2 cup semisweet chocolate chips(I used 100 gms of dark chocolate)

Procedure:

Preheat the oven to 180C and grease a 9’x3’ bread tin.

Melt the butter just a bit by microwaving it for 30 secs. Melt the chocolate in a separate cup by microwaving it at high for 1 min, and then stir it to mix the lumps.

In a mixing bowl, mix the sugar and butter. Add the mashed bananas and yogurt to this, and mix well.

Sieve the flours with the soda and salt. Add the wet mixture to this and mix it well to a batter consistency.

Take about half a cup of this batter and mix it with chocolate in a separate cup.

Pour the white batter and the chocolate batter alternatively into the bread tin. And mix them with a spoon, just once. The layers should be visible in this bread.

photo

Bake at 180C for about 75 mins. I baked it at 185C for 60 mins and at 170 for 15 mins. Check for the tester to be clean.

Cut it in slices, and serve. This bread stays better and tastes awesome when you let it in the fridge overnight. We ate it for breakfast the next morning, and absolutely loved it!

Oct 19, 2010

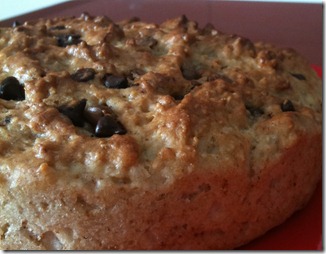
Banana choco-chip cake


I bumped into this recipe when I was searching for some fruit based cakes. I had grown tired of baking the same recipes over and over again, and so this one was a total welcome bake. The banana flavour blended with the chocolate flavour and tasted heavenly. This is a dense cake, and I followed the recipe to the T. This yielded me one 6’ round cake, and two 3’x2’ square tin full of cakes, which I gave to friends who seemed to like this too.

photo11

So here it is. I slightly modified the recipe from here, to make it eggless.

Ingredients:

1 3/4 cup Flour
2 tsp Baking Powder
¼ tsp Baking Soda
1 tsp Salt
¾ cup Brown Sugar
2/3 cup Chocolate chips
3 Bananas (overripe), peeled. You can either mash them or paste them.
1/6 cup Oil
4 tbsp thick yogurt

Procedure:

Preheat the oven to 200C and grease the cake tins.

Sieve the flour, salt, baking powder and baking soda together. In a large mixing bowl, mix the yogurt and sugar together. Add the oil to this mixture and whisk well.

Mix the dry ingredients with the wet ingredients just about enough. Add the choco chips to this mixture and fold in.

Pour in the cake tins and bake for about 30 mins at 200C or till tester is clean.

Oct 13, 2010

Peanut Butter Choco-chip cookies


Ever since I read on JoyTheBaker’s blog about Peanut butter and chocolate together, I have been drooling. No, am not kidding. I have been literally thinking about how awesome peanut butter would taste if I make a brownie with it or a cake with it and so on…

For someone who has discovered peanut butter very recently(just about an  year ago), I have taken to it like its my staple diet. If I was not worried about the fat I’d pile on with all that eating of PB, I’d probably have it everyday for breakfast and lunch and dinner also. Yes, thats how much I love PB. And every time I have it with jam and bread for breakfast, I remember the taste the whole day and grin to myself. Yes, the way I love PB is just weird!

So imagine how much I’d have been craving and thinking about PB being in one of the baked dessert items. Yes, it was on my head ever since I read that post.

Just the other day, I came home frantically wanting to make something with PB. I rushed through my bookmarked recipes and found this recipe(the one listed at the bottom of this post, under Recipe Courtesy) . And I was about to start making it, when I realized I had run out of baking soda. Aaaaah! The horror! So I ended up making Dark Chocolate brownies, which turned out to be heavenly and is a totally different story. But remember, my PB craving has not been satiated yet.

As much as I loved the thought of the Dark Choc brownie around me – in my fridge, in my tummy, in my mouth – anywhere, I was waiting for it to be finished, so I could try something with PB. Yes, I have to wait for one dish to finish before I start baking another, this is the only way I can kill the guilt that eats me up!

Going to Mom’s house came as the perfect opportunity, and I jumped to it. That was when this awesome cookie was baked, and was loved by both of us. (For the total non-dessert eater that S was, its sad how I have changed him. He eats everything I try and gives me very constructive criticism if its gone bad and reaches out for the second piece every single time :D)

PeanutButterCookies

Ingredients:
1/2 cup granulated sugar
1/2 cup brown sugar
1/4 cup creamy peanut butter
1/8 cup water
1/2 cup oil 
1 tsp vanilla extract
3/4 cups all-purpose flour
1/2 cup whole wheat flour
1/2 tsp baking powder
1/2 tsp baking soda
1/4 tsp salt
1/4 cup semisweet mini chocolate chips
8 spoons of milk(If the batter is too dry, mix spoon by spoon)

Procedure:
1. The usual drill – pre-heat the oven to 200C and prepare your baking sheet. Mine is as usual foil wrapped on my grill
2. In a large mixing bowl, mix the peanut butter with the sugars, water, oil and vanilla extract
3. Sieve the flours with baking powder, baking soda and salt
4. Pour the flour mixture into the wet ingredients mixture and mix just enough
5. If you see that the mixture is too dry for you to roll the dough into balls, add spoon by spoon of milk into the batter, till you see the right consistency (This piece of advice came as a life-saver from N at the right minute for me)
6. Add the choco chips to this mixture and do not over-mix
7. On the baking sheet, take a spoonful of the dough and roll it into a small round ball. Flatten it on the sheet. If you would like to beautify it, do so with fork impressions, which is what I did.
8. Bake this for about 20 mins at 200C and flip the cookies to ensure that the other side is baked as well
9. Bake the other side for about 10 mins at 185C

This cookie does not melt in the mouth as I have seen, but it tastes brilliant. The PB taste is not too much to overpower your other taste buds, but is still distinctly felt. On cooling, this cookie does turn out to be a little hard, but I am okay with it, since the overall fat content of this cookie is way lesser than the other pure-butter ones. And next time I try this, I am going to do this with whole-wheat flour.

Recipe from – My Diverse Kitchen

Oct 12, 2010

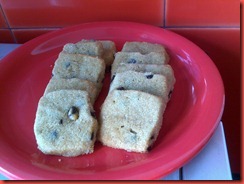
Espresso choco chip shortbread cookies


Now, cookies are something I always see on blogs, drool  upon, wonder if I should try them and tell myself that I can never pull them off and close the blog dejectedly. In addition to my doubts on my baking capabilities, there is one more reason. I can never afford to eat that much butter. The amount of butter in the cookies is just plain… humongous! And there is no way on earth I can make and eat them and not feel guilty.

But this one particular evening, after having had loads of cookie discussions with friends on Twitter, and after having stared at this recipe page (link in the Recipe courtesy below) for a considerable amount of time, I decided I will try baking this one.
So what if it uses an entire butter stick! (Too scared of the amount of butter in this, I decided to halve the portions, though)

Oh but then, I knew I was having guests who were to stay over, so I thought I’ll bake these cookies for morning coffee and impress them.

03102010168

Ingredients:

1/2 tablespoon instant espresso powder(Nescafe it is!)
1/2 tablespoon boiling water
1 sticks (4 ounces) unsalted butter, at room temperature(I used 100g of Amul butter)
1/3 cup granulated sugar
1/4 teaspoon pure vanilla extract
1 cups all-purpose flour
3/4 cup store-bought mini chocolate chips
 

Procedure

1. No need to preheat the oven now :)
2. Mix the espresso powder with the hot water to make strong coffee and set it aside to cool
3. In a large mixing bowl, mix the butter and the sugar well enough to make a smooth mixture. Add the coffee and the vanilla essence to this mixture
4. Add the flour to this mixture and mix just enough

02102010162

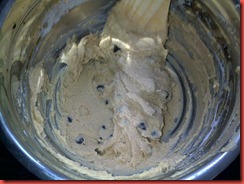
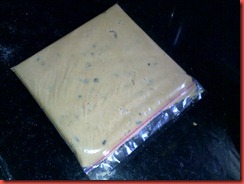
5. Take a small sized zip lock bag and transfer the batter into the bag. Lay it on the counter and even it out carefully, so that there are no creases in the plastic sheet. Also be careful to not let the batter out of the bag. Once the batter is spread evenly to all corners of the bag and is of even thickness, close the bag and put this in the refrigerator

02102010163
6. I let this bag be in the fridge overnight, and removed it the next morning
7. Preheat the oven to 200C and line up the baking sheet. I wrap my grill with aluminium foil and use that as the baking sheet. Gives me a lot of space. Yet again, a friend gave me this idea.
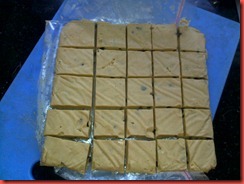
8. Cut open the plastic bag, and cut even squares of the batter

03102010166

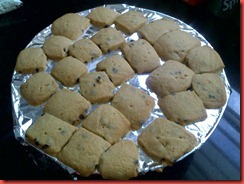
8. Put these on the baking sheet atleast 2 inches apart from each other and bake them at 185C for about 15 mins.
9. I had to flip the cookies and bake the other side for 4 mins too

03102010167

10. Did you spot a mistake that I did here? Well, I turned lazy midway and tried putting as many cookies as possible on the sheet, and see what happened. Luckily, this wasnt a huge mistake, and I could easily break off the cookies that were stuck to each other

We enjoyed them in the balcony with lots of conversations, and had a great time. But there is no way I am going to bake these cookies all for ourselves. I even gave away half the amount of cookies to S’s colleagues. They were addictive and we were scared we’d eat them up ourselves and then roll over in guilt :)

Recipe Courtesy : Smitten Kitchen (Check out her photos. They are enough to make you drool!)

Oct 11, 2010

Dark Choc brownie to end a tough day!

Today was not a good day. I cant point out at one reason, but it has been a very stressful day, with even a panic attack. Dont ask me the reason, I’ll tell you when I figure it out myself.
Suddenly at 3PM , I felt this craving to bake something. It might’ve been my mind’s escape mechanism to get out of the stress and calm myself, but it took a lot for me to stay on till 6PM at work after that thought. The minute I reached home, I ran to the kitchen and took stock of things I had. No walnuts. No Baking soda. But yes, loads of dark chocolate(I bought a big bar of cooking chocolate, inspired by N, hoping that would help me when I run out of stuff. And yes, it did!) Now what would I bake. One look at the recipe notebook(I bookmark all interesting recipes I come across in OneNote Notebooks, filed by sections. Yeah, I really use technology for all walks of life :P) and I saw that there were a couple of brownie and cookie recipes that I had wanted to try out.
My mind did a minor ping-pong jig and told me to do something with peanut butter and/or chocolate. More and more browsing led me to this fave site of mine. I picked up the recipe, halved the measures, modified it slightly to make it egg-less and voila! I had my dark chocolate brownie ready!
It tasted absolutely heavenly, and this is one brownie I am going to make and not share with anyone. Honestly!
Ingredients
8 tbsp (125gms or 1/4 of the 500gm bar) unsweetened chocolate, coarsely chopped
6 tbsps unsalted butter(75 gms – 3/4 of the Amul 100g butter pack)
2/3 cup all-purpose flour
1/2 teaspoon baking powder
1/4 teaspoon salt
1 cups sugar
2 large eggs (I used 4 tbsps yogurt, hoping it would add to the density)
1 teaspoons vanilla extract
1/2 teaspoon instant espresso powder
Oh btw, since the dessert was exotic, the dinner was just Foodles!
On a totally sidenote, do you think I might need help if I resort to baking even when I am stressed at work? Do you think this phase would pass off too? I hope it does, coz its not helping my hips! Sigh!

Oct 9, 2010

Zucchini zuppa

J, a very good friend of mine at work got me her big book on Soups and motivated me to try some from them. I’ve had the book with me for a while, and all I did was to turn the pages and sigh tiredly. The whole idea of going through the elaborate process of making the soup for the just the two of us was very tiring, but the photographs in the book were just luring me to try one of these. One weekend we were having friends over for dinner, and I had just the mood to do something new. One thorough look into the book told me that I have been tired for the wrong reason, coz the recipes in the book were just simple.

I picked up the most simple yet interesting one, and tried it. In spite of my doubts on its taste, the guests loved the soup. :)

02102010165

Ingredients

1 Zucchini, washed and chopped. Preferably green colored one
1 Onion, diced into medium sized pieces
4-5 garlic cloves, crushed
1 tbsp curry powder (I used Priya Koora Karam podi)
2 tbsp olive oil, for frying the Zucchini
1 cup vegetable stock
Some Italian herbs like Oregano and sage(optional)

Procedure

1. Put a medium sized pan on the stove and pour olive oil in it. Wait till the oil heats up and put in the onions into it
2. After a while, put in the crushed garlic cloves and sauté a bit
3. Add the zucchini pieces and sauté more till just enough. You can add the herbs at this point
4. Let this mixture cool down, and blend in a mixer or a  hand blender. The puree should not be too soft and should still retain very small zucchini pieces, and the green color
5. Put a medium sized saucepan on the stove, and heat this puree in it.
6. If the mixture is too thick, add the stock water and mix well and bring to a boil
7. Serve warm

The original recipe did not have the garlics, but I wanted to experiment with them and it just added to the taste. Also, the recipe says that this soup tastes better when it is served chilled. So try that option too.

Oct 8, 2010

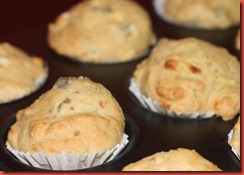
Olive-Jalapeno muffins

I’ve seen some savoury muffin recipes on couple of blogs, but never got around to baking them. Somehow, the shape and perception of a muffin in my head means it had to be sweet. And so I could never imagine how a savoury muffin should be or could be. Its been on the Do-List for a while now, and yday was the day.

Last evening, the husband guy suddenly said he wanted to eat something dry, spicy and with garlic in it.He obviously forgot to add the word fried in it and I grabbed the chance. I was also intending to bake some for some friends, so I thought I’d do these.

A quick tweet to my trusted advisors(read:Fellow bakers) and N called and dictated me the recipe from the Muffin Bible.

Jalapenos, garlic and herbs weren’t part of the original recipe, but I added them to add to appeal to the husband’s palate.

IMG_5944

Ingredients:
2 tbsp yogurt
1 1/4 cup yogurt
1/2 water
2 cups flour(I mixed 1 3/4 cups of wheat with 1/4 AP flour)
1/2 tsp salt
1 tsp baking powder
1 tsp baking soda
2 slices cheddar,cut into very small pieces
1/2 cup olives, de-seeded and chopped
1/2 cup Jalapenos, chopped to small pieces
1 tsp chilli flakes
some herbs like Oregano and Thyme (I added 1/2 tbsp of each)

Procedure:
1. Sieve the flour with both baking soda and baking powder and keep aside. Add herbs to this mixture.
2. Beat the yogurt till its soft and add water to it.
3. Mix yogurt with the flour mix and mix well enough.
4. Add the olives, cheddar and jalapenos to this, and mix just enough
5. Pour spoonful of this mixture into each muffin paper cup or a greased muffin mould.
6. Bake in a pre-heated oven(200C) for 12 mins at 200C.
7. Check the tester and if you feel that you still need to bake it, do so at 185C for another 4 mins.

This muffin tasted awesome when served warm from the oven, but it was better when it was eaten cold. I put this in the fridge and re-heated it this morning, for breakfast and it tasted good then too.
The cheese pieces along with the tanginess of the olives and hot taste of the jalapenos just tastes brilliant, and appeals to a different section of the tongue, altogether! :)

Shared some of these with friends at work, and they seemed to like these.

Sep 25, 2010

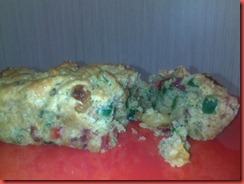
Simple Fruit cake (whole wheat)


If there has been one thing that I have always loved in a bakery, it was the fruit cake. I would go to every bakery that I’ve ever seen, pointed to the fruit cake and asked the salesguy if it was egg-less. And they would shake their heads, thus shaking my dream of digging into the cake. THe dream of eating an egg-less fruit cake had just been unrealized. So when I figured out my cakes were turning out pretty neat, I knew I was going to bake this.

Some blog-hopping last night, in search of the recipe to the Christmas cake, I bumped into Raaga’s blog, and saw the recipe. Now, this one says 3 cups flour, which I knew was way too much for our family. So I reduced the quantities accordingly. Also, I had soaked raisins in rum 4-5 weeks ago, in the hope of getting to make the Christmas cake someday. But since this one is simple and very close to my dream cake, I thought I might as well use up few from that tin as well. And then, there is no way I would be baking a cake with Maida, when I know its me and my family eating it.(:) the logic is that we dont eat Maida at all at home, and if I am gifting the cake to others, I might as well make it tasty which is with Maida :)), so I substituted maida with whole wheat flour.

So here is the scaled down recipe -

Ingredients:

1 cup wheat flour
1 1/2 cup fruit mixture (raisins, sultanas, figs, tutty fruity)
1 tsp baking powder
1/2 tsp baking soda

2 tbsp yogurt
2 tbsp fresh cream
1/4 cup vegetable oil
3/4 cup sugar
1 tsp of cinnamon and cardamom powders each
2-3 drops of vanilla essence

Procedure:

Pre-heat the oven till 200C.

Beat the cream and yogurt together with the oil and sugar. Mix them well with the spice powders and vanilla essence.

Mix together the flour, baking soda and mixture.

Fold in the wet ingredients into the dry ingredients, and mix. Add the fruit mixture to this, and mix well, so that the fruits are evenly distributed.

Pour into aluminium tins, and bake at 185C for 30 mins, or till the tester is clean.
This mixture fit into 5 tins of 4x3 inches, and I baked all of them at the same time.

Let it cool for a while.

25092010157

As usual, this is a bad pic, but no, this does not relate to the way this cake tasted. The husband even thought it resembled Dil Pasand, that sweet we used to eat in road-side bakeries as we were growing up :)
I gave a tin each to two of my good friends, and they seemed to love it too. So I guess this recipe will stay with me! :)

Sep 23, 2010

Coffee cinnamon cake with walnuts


Its been a very very busy day, with me not having time to even have my lunch. Well, lets just say that I didn’t realize it was 1:30PM till a friend called me for a coffee. And all day long, all I could think was that I would come  home and bake a cake and of course, listen to CokeStudio, Zeb and Haniya in particular.

Now, there is more than one occasion. P, a colleague at work didn’t get to eat the nutmeg cake that I baked, and she wanted me to bake a chocolate cake for her. I convinced her to agree to the walnut coffee cake, and somehow she agreed. Also, FIL was returning from his travel and he loves anything sweet. So, I thought I will use this chance and bake something, for him and for P too.

A search of recipes led me to this one on ChefInYou, but I was not very sure I wanted to bake the cake this way. So instead, I drew inspiration from the ingredients, and made my own recipe.

Ingredients:

1 cup AP flour(since both FIL and P like taste more than health, I decided to give the wheat flour a skip this time)
1 tsp baking powder
1/2 tsp baking soda
2 tsp dark choco chips
1/4 cup chopped walnuts
A pinch of salt

2 tbsps yogurt (you can substitute this with one egg, but I honestly dont know whats the difference)
2 tbsps strong black coffee
1/4 cup melted butter
3/4 cup sugar(I used regular sugar, but you can powder it too)
1/4 cup milk(if required)
1 tsp ground cinnamon powder

Procedure:
Preheat the oven to 200C and meanwhile, gather the ingredients.
1. Whisk butter and sugar in a bowl, and add yogurt and coffee to it. Whisk them all together. Mix in the Cinnamon powder too
2. Mix all the dry ingredients together along with the chopped walnuts and the choco chips
3. Mix the wet and dry ingredients in a bowl, but do not overmix them
4. Pour in a aluminium foil box or greased cake tin
5. Bake for 30 mins at 185C
6. Decorate with powdered sugar if you want
7. Let the cake cool and dig in

23092010153

The cake tasted pretty neat, but I figured out quickly that even coffee cake does not appeal to my palate. FIL liked the cake, and so did the husband though he said this certainly loses as compared to the nutmeg cake. :)

Update: Folks at work also liked it! Awesome!

Sep 22, 2010

Cake experiment - 1


Ever since I laid eyes on Arundati’s whole wheat nutmeg honey cake, I could not rest at all. No, I am not kidding. The desire to bake it and taste it has been so intense that I had to eventually give in to it, and make it.
May be it was the brilliant recipe or the need to prove to myself that I can bake a decent cake, or to have a nice cake recipe at hand when I call N and her family over for dinner, I baked it last night, on an experimental basis. The idea was that if this turns out good, I am going to bake it this weekend, for N! :)

I had all the necessary ingredients at hand, and since the recipe is so simple and easy, I came back from work, I got around to mixing the ingredients. After seeing how N had baked her cake(which btw was the best cake I ever ate, still waiting for her recipe so I can try it too) in small aluminium foil boxes, I decided to do the same too.

So, this is the recipe. I didn’t want to fiddle around with the ingredients and replace any, since I wanted to be honest with it.

58328_428542568363_694543363_5200516_212481_n

I did some variations, though.

1. Instead of dry ginger powder, I grated fresh ginger and mixed it with the wet ingredients.

2. I felt I didnt need 1/2 cup of milk, and so I added milk at the end, directly to the batter when I felt it got a little tight, like the muffin batter. Thankfully it mixed well. I must’ve used up 1/4 cup of milk

3. I ran short of honey too. It was little less than 1/3 cup of honey and so I compensated it with sugar

4. Now to the part that I am not proud of. I got lazy and didnt powder the sugar. I mixed it as it is into the dry ingredients and then cursed myself for having done that. Thankfully, it mixed well and I could not feel the crystals when the cake was done

The cake needed exactly 35 mins of baking at 185C, and it came out of the tin pretty easily, though I didnt dust it. The picture does not do any justice to how the cake tasted, honest to God! And the fact that it doesnt have any maida(I dont use maida at all! AT ALL!) made me feel really good about it.

There it is, my first ever proper cake. I did bake a carrot nutmeg cake for the husband on his birthday, but I knew I could’ve done much better than that. The husband who is a total non-sweet-lover also loved this cake, and asked for a second serving, which is a lot! :)

Sep 20, 2010

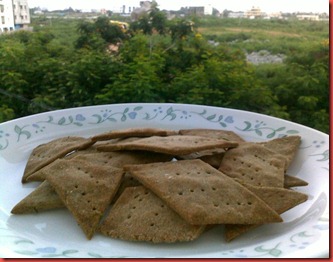
Basic Whole Wheat Crackers


Now, I’ve been looking at cracker recipes and drooling at the photos for a while.

Also, after the recent Chocolate-Apple-Cake debacle, I needed to do something to get confidence on my baking. That was when Nandita suggested me to take a break from baking cakes and do something different. Finally yesterday, I decided to start off and bake my own crackers, something basic just to get the hang of it.

Ingredients:

1 Cup Whole wheat flour (I used Ashirwad multi grain flour mixed with bajra and ragi flour – basically my roti flour)
A pinch of salt
Some chat masala
A tsp each of Thyme and Rosemary
5-6 Tbsps of Olive oil
Half a cup of water(or as needed)

Procedure:

1. Preheat the oven for 15 mins at 200 C

2. Meanwhile, mix all the ingredients into something which would resemble the roti ka ata

3. On a rolling stone, with the help of a rolling pin, roll the dough into a perfect circle

4. Using a pizza cutter, cut the circle into diamond shapes. Alternatively, you can cut them into circles using a sharp-rimmed glass

5. Put holes all over the shape using a fork and bake these in batches in the oven

6. With the above ingredients, I had to bake the crackers in 3 batches, and each of them took me around 20 mins at 185 C. This time and temperature is highly dependent on the make and model of the oven.

7. Bake till you can break one cracker and feel the crispiness in it. Or till the color turns a good golden brown.
8. Eat at tea-time or during the day, like how I did! Smile

58369_427715148363_694543363_5181663_1362613_n

What I loved the most about these crackers is that they are absolutely healthy with nothing except Wheat flour in them, and the fragrance of the herbs used also added to the pleasure!

Variations:

I was thinking that the next time I bake these, I’d add some butter to make them a little softer and add other herbs like some oregano or sage . I was also thinking about adding some pesto next time to get some basil flavour, or see if I can add some hummus to this to up the protein content. Since this is a basic recipe for crackers, I guess one can experiment as much as they want with this!

Sep 15, 2010

Chocolate Apple cake


Mother-in-law was visiting and I wanted to bake something nice and special for her. Okay, that’s just a pretence. I had been dying to bake a cake for a while, after all those successful attempts at muffins and the wows I got for them. I was thinking cakes wouldn’t be much different from muffins, and I would do great at them too. Also, at the Landmark book sale, I picked up this nice little book on Home Baking which had some great recipes for muffins and savoury bakes.

I opened the book and the baked the first recipe I bumped into. Well, not exactly the first, coz the first one turned out to be yet another muffin, albeit a very interesting one. But remember, I wanted to bake a cake, no more muffins, since I had graduated the Muffin class :)

I closed the book and when I reopened it, I saw a very beautiful pic of Individual Chocolate apple cakes. Now, this recipe is for individual cakes, but I didnt have the patience to lay the muffin tray, and so baked the whole dough into one cake.

20092010146

Given above is the original pic given in the recipe book, and the recipe is as below -

Ingredients:

150gm butter

1/4 cup sugar (I used dermerra sugar)

3 eggs (I used 6 tbsps of thick yogurt)

2 cups plain flour(Again, I substituted this for whole wheat flour)

1/4 cup cocoa

3 tsps baking powder

560 gm canned apple pieces (I used one full apple finely chopped)

Procedure:

1. Preheat the oven till 180C

2. Melt butter in a saucepan on low flame, and beat in yogurt(or eggs) and sugar into it.

3. Sift the dry ingredients together and mix in the wet ingredients into this. Do not beat it, but mix it gently

4. Pour one layer into the greased muffin tray , top it with apple pieces and pour more batter into it. Since I decided to make the cake, I poured one layer of dough, one layer of apple pieces and another layer of dough, all in one baking dish

5. Bake for 15-20 mins at 180C or till the tester comes out clean. I had to bake this for 30 mins, may be because of the thickness of the dough and the wattage of my oven

61220_426413338363_694543363_5155203_2395938_n

We ate it with vanilla ice-cream, but I bet it would be awesome eaten with Baileys. In spite of everyone liking the taste of this cake, I did not quite enjoy it, may be because of my wearing fascination on chocolate cakes. I had recently baked a bunch of chocolate muffins without checking any recipe book, which turned out awesome too, but I guess I grew out of chocolate based bakes. I secretly took a vow to not try any more chocolate based ones, and move on to other flavored cakes.

Sep 11, 2010

Vanilla Chocolate muffins


U and her husband, great friends of ours invited us over for breakfast to their house. We love going over and feasting on on the awesome dishes she cooks for us, but this time I decided to not be shameless and bake something for them. Particularly after S, U’s husband loved the apple muffins I made for them last weekend, I didn’t want to miss out on an opportunity to get some more wows :)

Nandita had suggested that I bake some awesome fruit buns for them but because we worked late on Friday, I could not pick up Tutty Fruity without which there would’ve been no point in making them. I quickly browsed for some good muffin recipes given the limited range of ingredients I had at hand, and landed at Arundati’s awesome cupcakes and this . Since I was well aware of the limited time I had at hand, and my ability to decorate something, I decided to go with the simpler version of these recipes.

Ingredients:

1/2 cup unsalted butter, room temperature

2/3 cup dermerra sugar

6 tbsp thick yogurt

1 teaspoon pure vanilla extract

1 1/2 cups all purpose flour (maida)

1 1/2 teaspoons baking powder

1/4 teaspoon salt

1/4 cup milk

I Bournville bar(chopped into small pieces for garnishing)

Procedure:

Mix all the dry ingredients and set the oven to preheat till 200C

Whisk all the wet ingredients till they form into a smooth thick liquid and add this to the dry ingredients. Mix well, but do not beat the batter.

Pour this batter into a well greased muffin tray or into the muffin paper cups.

Sprinkle or place the Bournville pieces in the muffin batter.

Bake for 20 mins at 185C or till a tester comes out clean.

46864_424432238363_694543363_5109440_537021_n

Dig in the minute it comes out of the oven. :)

Well, I used Bournville as a substitute for the choco chips. The next day, I got some choco chips from QMart, and since we had a friend visiting, I baked these muffins again with choco chips. But I did not enjoy them as much as I did the earlier ones, ie., the ones which had Bournville. THe chocolate had nicely melted and had spread the flavor to the batter, and when it cooked, it was still soft. This, I feel gave the whole muffin a very nice distinct taste which lacked when I used choco chips.

Sep 6, 2010

The whole pasta story


After all the eating we did yday, I had no patience to enter the kitchen anymore. The cook had come early in the morning and made methi parathas for lunch for both of us, and also some breakfast. All we did the whole day was to laze around, read books and watch a bit of TV and of course, fight over who gets to sit in the bay window. Only in the evening did I realize that I had not planned anything for dinner and that S, the husband guy, would soon start complaining of how loud his stomach is rumbling. I had to quickly think of what to do, and thats when it struck to me that I had a big bowl of veggies lying in the freezer, the ones that I could not bake into the au gratin. And the next thing I thought of was Pasta! Yaay! :)

Yes, pasta is my favourite dish to eat or to cook. My love affair with pasta started when we started dining at Little Italy, and I would always order for a pasta and S would ask for his favourite Siciliano Pizza. Then I gave the whole dish a thought and figured out I could probably cook it at home too. Thats how my journey with pasta started. I used to make pasta using the Barilla readymade pasta sauces. Then the health-food trip in life started and I could smell the artificial ingredients through the sauce. The pasta would be all wheat based or organic and the sauce would be artificial. Uuuugghhhh!

Some more serious thought and I decided to just make my own sauces. White sauce was always out of the question, coz we both never really liked it, the color and its texture. Red sauce it had to be then.

I am still not sure how different or same my pasta recipe is from the others, but for a long time, I would only cook one type of pasta, almost every weekend. Pasta with whole lot of veggies sauted in olive oil, boiled in mashed tomatoes and some Italian herbs for garnishing. It tastes great, is very healthy and that was what mattered to me.

Father-in-law and the husband vouched for its taste but guess somewhere down the line, I got tired of making the same pasta and my palate started asking for more. That was when i discovered this very awesome tasting and healthy pasta recipe on SaffronTrail. So that was it for some more days, till one day when S told me that now he is tired of the same recipe.

So with the box full of sauted veggies in my freezer and a bottle full of homemade basil pesto sauce in my fridge, I decided to cook something which would replicate the taste of basil pesto pasta I ate at Sweet Nirvana the other day. That was how my other pasta recipe was born.

I just sauted the veggies more, put in two dollops of basil pesto sauce in it, and sauted it for 2 mins. Added the cooked fusilli to the mixture, and voila, our dinner was ready.

It didnt exactly taste like the one I ate in Sweet Nirvana, but S loved it so much that he called this my best ever pasta. Now, thats enough for me! :)

Good friends, great weather and some good conti food


We had invited S, her husband and her beautiful daughters over for lunch over the weekend. S was working and came in a bit late, but her husband and the girls came over a little early. The weather was just perfect. It wasnt raining thankfully(after the endless rains over the past few months, this was a welcome break!) and it wasnt sunny either. It was this perfect mix of clouds, no humidity and cool breeze. The guys had settled down in the balcony, and I was shuttling between the kitchen, the balcony and the bedroom where the girls were playing. Kitchen because I was making bruschettas as appetizers, balcony was to catch a bite or two of them as they were fast disappearing and bedroom coz I loved playing with the girls. Thankfully I had prepared lunch and apple muffins (for the girls) much earlier and the dish had finished baking also, so when S came back from work we just talked and talked and talked. It was 4 by the time we had our lunch, but we kept our stomachs and legs busy with the bruschettas, and running behind the girls, in that order. :)

While browsing for one-dish bakes, I came across this wonderful recipe of au gratin. Since au gratin was something I had never heard of, I wanted to try this one out. And since this one was full of veggies, I thought this would be a healthy dish for the girls too. Semolina was something I got interested in, but I wasnt comfortable with the eggs in the dish. Moreover, I wasnt sure how to make the white sauce. So I browsed some more and bumped into this recipe

So there it was. I made my first ever au gratin, and followed the recipe pretty much to the T. We ate it with some fresh focaccia bread from Sweet Nirvana and burped! :)

47567_422211628363_694543363_5062338_1148002_n

We wrapped up the day with some more chocolate muffins that I baked freshly in the evening. I and the husband somehow managed to keep some place in the tummy aside to dine at MasterChef Nandita’s place. She had made great Pav Bhaji, and we had a good time chatting late into the night.

All in all, it was an awesome weekend spent with great friends and good food. What else does one need! :)

Sep 3, 2010

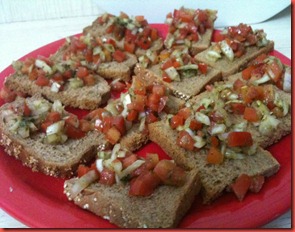
Bruschettas… Yaay!


Yes! I made Bruschettas. First time ever! And I can’t stop grinning. They have been a favourite with both of us since forever and these actually made the husband so excited that he even asked for some bread based dish for dinner also!

Of course, as usual the inspiration came from Nandita, but the achievement here is that I did not look up for the recipe. I just went through the taste in my mind and made up the list of ingredients. I still haven’t looked up for the correct recipe, coz I loved mine so much.

Ingredients:

For the topping:

3 ripe big tomatoes, de-seeded and chopped into small pieces

1 big onion, chopped into small pieces

2-3 tbsps olive oil

1 dollop basil pesto sauce

Salt & Pepper for taste

Oregano, if required for taste

For the bread:

Baguette. But I used regular whole wheat bread. Cut it into pieces and baked it at 200C for 5 mins. Rub in peeled garlic clove into it. Its amazing to see how the garlic clove melts and sticks to the bread.

Procedure:

Mix all the ingredients for topping. Place small quantities of this on the baked bread pieces.

Serve and gorge!

58394_421965683363_694543363_5057773_3351213_n

Now, I made these as a tester to see if they’d be good if I make them when S and her family came over tomm. They tasted so great that we had these for dinner that day. Yes, one full loaf of bread between the two of us! :)

Sep 2, 2010

Risotto. First time ever!


The first ever time I ate Risotto was at N’s place, when she called me over for dinner. I loved the texture and the taste of the dish so much. And my love for all things Italian(;-)) told me that I should try this one for sure.
For days, I searched the markets for Arborio rice and finally I found it in QMart. I also bought some Zucchini to try and make some salad. So I thought, Would there be a recipe for Zucchini Risotto? I browsed for a while, and got a couple of links. All of them with some meat ingredient. So I adapted this recipe from various links I got, and of course from my conversation with N the night I ate there.
Ingredients:
1 cup Arborio rice (Some recipes say you can use Indian brown rice also, but I am yet to try that)
3 tbsps Olive Oil
2-3 crushed garlic cloves
1 cup white wine
1 zucchini, cut into longish pieces
3 cups of vegetable stock (I made my own stock by boiling some veggies in water, and saving the water)
Some herbs like Oregano, Thyme and Rosemary
Salt & pepper to taste
Procedure:
Heat the olive oil in a pan, and saute the garlic cloves and herbs in it.
Add the zucchini pieces and saute for some more time. Now add the rice, and saute till the rice is covered in olive oil.
Pour the wine into the rice. Stir continuously till the wine is absorbed. After the wine is totally absorbed, pour one cup stock and stir more.
After the stock is absorbed again, pour one more cup and stir. Repeat the exercise till all the stock is used up, and the rice assumes a very creamy soft texture. If the stock is not enough for the rice, use some more stock. The idea is to cook the rice al dente.
Check the taste and sprinkle some salt and pepper to taste.
If you have some more wine left, pour it into glasses, and drink it along with the meal.

Now, I liked the taste of this dish, but the creamy texture is something I am yet to get used to . As of now, I am looking out for other recipes using the Arborio rice, so I can experiment them all. Next version of Risotto would have to wait for a while.